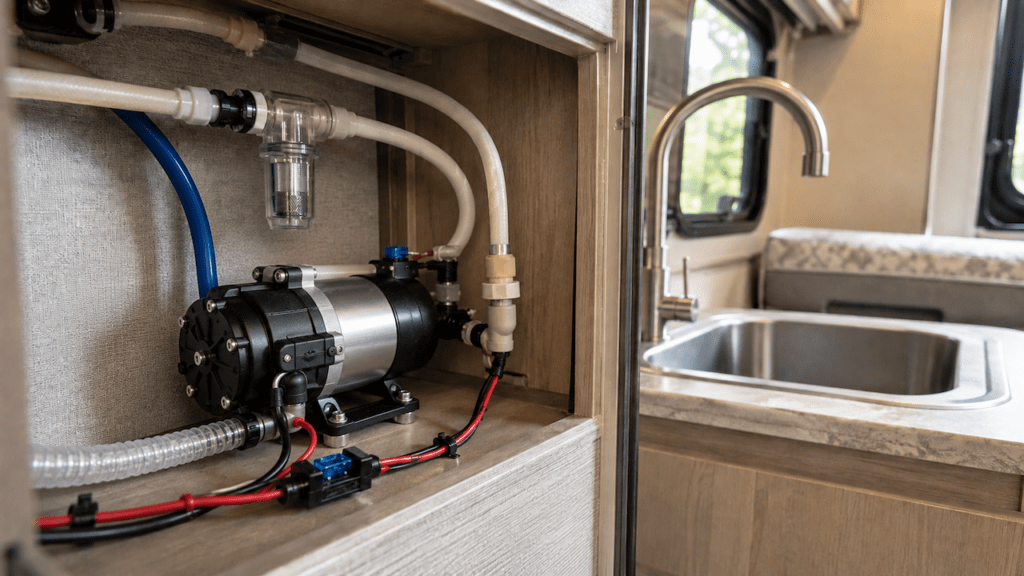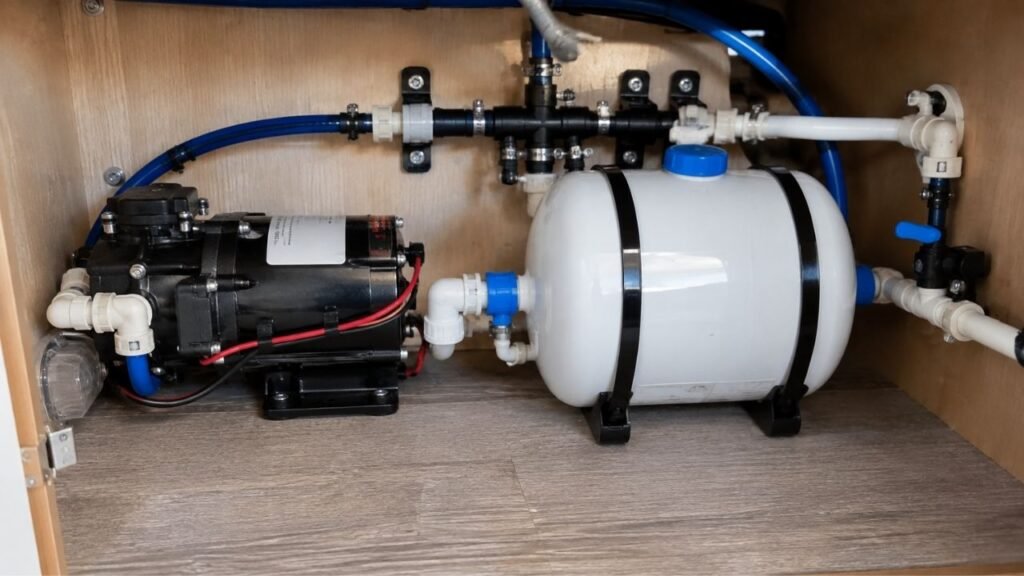
Your RV water pump usually leaks around the pump head because of loose screws, a damaged diaphragm, a leaking pressure-switch seal, cracked plastic, or a loose inlet or outlet fitting. Freeze damage and road vibration can also create small leaks around the pump-head assembly.
The tricky part is finding the exact starting point. Water can travel along the pump housing before dripping underneath it. I’ll help you identify the leak, choose the right repair, and decide when replacing the pump makes more sense.
Key Takeaways
- Dry the pump completely before trying to locate the leak.
- Pump-head leaks often come from screws, diaphragms, seals, or cracks.
- A leaking fitting can easily look like a pump-head leak.
- Freeze damage can crack the plastic housing or internal diaphragm.
- Avoid overtightening screws or fittings in plastic pump components.
- Many pumps allow pressure-switch or pump-head repairs separately.
- Replace the pump when structural damage makes repair unreliable.
Where Is the Water Actually Leaking From?
Before taking anything apart, identify exactly where the first drop appears. The location usually gives you a strong clue about what failed.
| Where Water First Appears | Most Likely Cause | What to Check First | Typical Repair |
| Pump-head seam | Loose screws or damaged diaphragm | Pump-head screws and seam | Tighten or rebuild head |
| Pressure-switch housing | Damaged switch diaphragm or seal | Switch cover and mounting area | Replace switch assembly |
| Inlet connection | Loose fitting or damaged seal | Inlet fitting and strainer | Reseat or replace fitting |
| Outlet connection | Loose fitting or damaged seal | Outlet fitting | Reseat or replace fitting |
| Between head and motor | Main diaphragm damage | Pump-head interior | Repair head or replace pump |
| Plastic pump housing | Freeze damage or stress crack | Housing under bright light | Replace damaged head or pump |
| Nearby strainer | Loose cap or damaged O-ring | Strainer bowl and cap | Clean, reseat, or replace |
| Only while pressurized | Weak seal, crack, or fitting | Entire pump while running | Repair exact leak source |
A few drops underneath the pump do not automatically mean the head failed. Start at the highest wet point and work downward.
Why Does My RV Water Pump Leak Around the Pump Head?
Several problems can create nearly identical symptoms around the pump head. Knowing the differences helps you avoid replacing parts unnecessarily.
Loose Pump-Head Screws
RV water pumps deal with constant vibration while you travel. Over thousands of miles, that vibration can gradually loosen pump hardware.
When the pump-head screws loosen slightly, water can escape through the seam. You may first notice a tiny bead forming around the housing.
The leak can become worse when the pump reaches full pressure.
Turn the pump off before checking the screws. Tighten them gently and evenly rather than forcing one screw tight.
If the leak continues, loose screws probably were not the only problem.
A Damaged Pressure-Switch Diaphragm
The pressure switch tells the pump when to start and stop. A small diaphragm inside that assembly helps respond to water pressure.
If that diaphragm becomes pinched, torn, or distorted, water may appear around the pressure-switch portion of the pump head.
This leak is easy to confuse with a main pump-head leak.
Watch carefully while the pump pressurizes the plumbing. If moisture begins around the switch housing, inspect that assembly first.
Many popular RV pumps have replaceable pressure-switch components.
A Punctured or Worn Main Diaphragm
The main diaphragm is one of the hardest-working pump components. It repeatedly flexes whenever your pump moves water.
Age, debris, heat, and normal wear eventually affect the material.
A damaged diaphragm may allow water into areas where it should never travel. You might also notice weaker flow or unusual pump cycling.
Other possible signs include:
- Reduced faucet pressure
- Longer pump run times
- Difficulty reaching shutoff pressure
- Water appearing behind the pump head
- Frequent cycling after faucets close
A diaphragm problem normally requires opening the pump head. Check whether your model has a compatible rebuild kit first.
Freeze Damage Cracked the Pump Head
Freeze damage is one of the biggest concerns after winter storage.
Water trapped inside the pump expands as it freezes. That expanding water can place tremendous pressure on plastic components.
The resulting crack may be extremely small.
Sometimes the crack is almost invisible while the pump sits dry. Once the system reaches pressure, the crack opens enough to leak.
Suspect freeze damage when the pump worked normally before winterization but leaks during spring startup.
Check around:
- Threaded ports
- Pump-head seams
- Screw mounting points
- Plastic corners
- Pressure-switch housing
- Strainer housing
A structurally cracked housing should normally be replaced rather than patched.
The Inlet or Outlet Fitting Is Leaking
This is one of the easiest problems to misdiagnose.
Water escaping around a fitting can run across the pump body. It may finally drip underneath the pump head several inches away.
That makes the pump itself look guilty.
Dry both fittings thoroughly. Then pressurize the system and watch the connections closely.
Check for:
- Loose connections
- Damaged fitting seals
- Flattened O-rings
- Cross-threaded fittings
- Cracked threaded ports
- Damaged quick-connect fittings
Do not automatically reach for thread tape. Some RV pump fittings seal with O-rings or internal tapered surfaces.
Follow the fitting design used by your specific pump.
The Pump Housing Was Damaged by Overtightening
Trying to stop a small leak can sometimes create a larger one.
Plastic pump housings do not respond well to excessive force. Overtightening a fitting can distort threads or crack the surrounding housing.
Pump-head screws can also damage plastic mounting points when overtightened.
If the leak started after plumbing work, inspect that area carefully.
A hairline crack around the fitting port is especially suspicious.
Debris Is Affecting the Internal Pump Components
Small particles can enter the water system from the fresh tank.
Sediment, plastic fragments, mineral deposits, or other debris may reach the pump if the inlet strainer cannot catch everything.
Debris can interfere with valves and sealing surfaces inside the pump.
You might notice:
- Irregular pressure
- Pump cycling
- Poor priming
- Reduced flow
- Internal leakage
- Unusual pump sounds
Clean the pump strainer first before assuming internal components failed.
If debris continues returning, your freshwater system may need cleaning.
Rigid Plumbing Is Stressing the Pump Head
The plumbing connected to your pump should not constantly pull sideways.
Rigid tubing placed under tension can transfer stress directly into the pump ports. Pump vibration adds even more movement at those connections.
Over time, the fitting may loosen or the housing may crack.
Look at the plumbing while the pump runs.
If the water line pushes, pulls, or twists against the pump, correct that problem before installing replacement parts.
Otherwise, the new fitting or pump may eventually leak too.
Is the Pump Head Really Leaking or Is Water Running Down From Somewhere Else?
Water does not always drip directly below its starting point. It can travel across hoses, fittings, wires, and pump housings first.
That makes leak diagnosis surprisingly frustrating.
I recommend drying everything around the pump completely. Use a towel until the housing, fittings, strainer, and floor feel dry.
Turn the pump on briefly and let pressure build.
Then watch for the very first shiny wet spot.
A dry paper towel also works well for slow leaks. Press it gently against individual seams and fittings.
The first damp section usually exposes the true source.
Check above the pump as well. A leaking hose connection located higher up can drip onto the pump head.
What Should You Do Before Working on a Leaking RV Water Pump?
A few preparation steps make this repair cleaner and safer. They also prevent stored water pressure from surprising you.
- Turn off the RV water pump switch.
- Disconnect the RV from city water.
- Open a faucet to release plumbing pressure.
- Close the fresh-tank valve if your RV has one.
- Disconnect pump power before removing electrical components.
- Put towels underneath the pump.
- Keep a shallow container nearby for remaining water.
- Photograph the plumbing before disconnecting anything.
- Write down the pump model number.
- Check the exact replacement parts before disassembly.
Do not begin removing pump-head screws while the system remains pressurized.
How Do You Find the Exact Source of an RV Pump-Head Leak?
A simple inspection process can prevent unnecessary pump replacement. Work from the outside inward instead of opening everything immediately.
1. Dry the Pump Completely
Start with a completely dry pump and surrounding area.
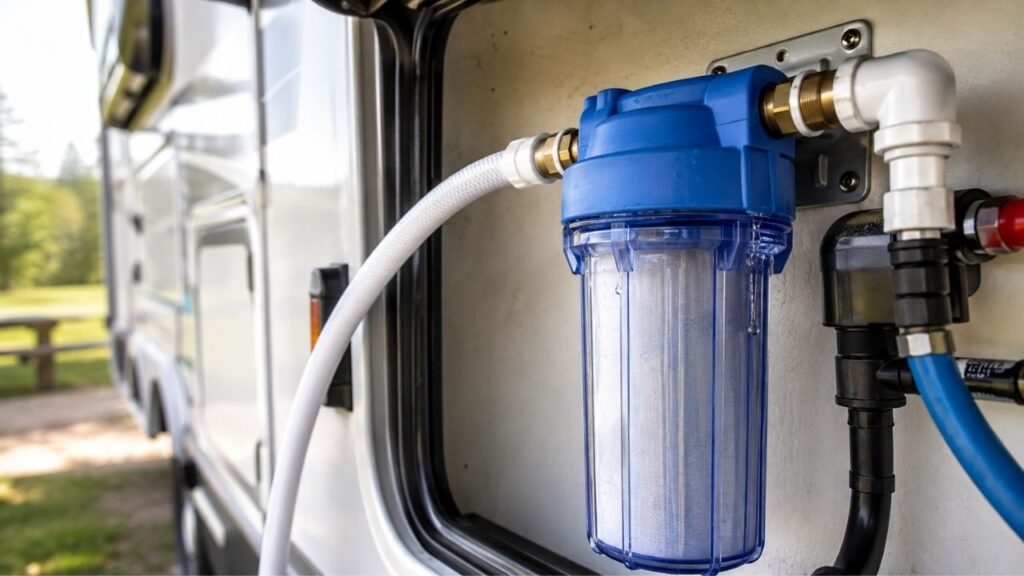
Wipe the head, fittings, strainer, motor housing, hoses, and mounting surface.
Even one leftover drop can send you in the wrong direction.
2. Inspect the Inlet, Outlet, and Strainer
Look at the easy external connections first.
A loose strainer cap or fitting is much easier to repair than an internal diaphragm.
Check for water around the inlet fitting, strainer, and outlet fitting.
Look closely around seals and threaded connections.
3. Check the Pump-Head and Pressure-Switch Seams
Inspect each seam where sections of the pump housing meet.
Use a flashlight if the pump sits inside a dark compartment.
Pay extra attention around the pressure-switch housing.
4. Pressurize the System Briefly
Turn the pump on and let it build pressure.
Do not run it longer than necessary while water is leaking.
Watch the pump instead of immediately opening a faucet.
You want to identify where water appears under full system pressure.
5. Look for Hairline Cracks
A crack can be difficult to see on dark plastic.
Shine a flashlight across the housing from the side. This often makes tiny cracks more noticeable.
Focus on high-stress locations, including:
- Fitting ports
- Screw holes
- Housing corners
- Molded seams
- Strainer connections
If possible, watch those areas while the system pressurizes.
6. Think About When the Leak Started
Timing gives you useful clues.
A leak appearing immediately after winter storage strongly points toward freeze damage.
A leak appearing after rough travel may involve vibration or loosened fittings.
And, a leak starting after plumbing work suggests a disturbed seal or overtightened connection.
7. Check Whether Water Reaches the Motor Side
Water should stay inside the pump’s wet section.
Moisture appearing toward the drive or motor side raises concern about diaphragm damage.
Turn the pump off if water reaches electrical components.
Do not keep operating it simply to watch the leak.
How Do You Fix an RV Water Pump Leaking Around the Pump Head?
The correct repair depends on where the leak begins. Avoid replacing the complete pump until you know which component failed.
Tighten Loose Pump-Head Screws Carefully
If water appears directly along the pump-head seam, inspect the screws.
Tighten them gradually and evenly.
Do not completely tighten one screw before checking the others. Even pressure around the head is important.
Avoid excessive force.
Plastic threads and screw bosses can crack or strip easily.
If your pump manual specifies a torque value, follow that specification.
There is no single tightening value that applies to every RV water pump.
Reseat a Leaking Pump Fitting
Turn off the water and relieve pressure first.
Disconnect the leaking fitting and inspect its sealing surface.
Look for damaged O-rings, flattened seals, dirt, cracked threads, or cross-threading.
Clean the connection before reassembly.
Use only the sealing method designed for that fitting.
Some fittings use an O-ring and need no thread sealant.
Others have manufacturer-specific instructions.
Tightening the connection harder is not always the correct solution.
Replace a Leaking Pressure-Switch Assembly
If water starts around the pressure-switch housing, that section may be serviceable separately.
Find your pump’s exact model number before ordering anything.
Do not assume pressure switches from similar-looking pumps are interchangeable.
Turn off power and water before removing the switch assembly.
Install the replacement exactly as designed for your pump.
Afterward, pressurize the system and inspect the repair closely.
Install a Pump-Head or Diaphragm Repair Kit
A rebuild can make sense when the motor remains strong.
Replacement kits may include:
- Pump diaphragm
- Valve assembly
- Upper housing
- Seals
- Check valve
- Pump-head components
Exact contents depend on the pump model.
Keep every sealing surface clean during the repair.
Even small pieces of dirt can prevent proper sealing.
Pay close attention to component orientation during disassembly. Taking photos along the way can save plenty of frustration.
Replace a Cracked Pump Head
Some pump models allow the complete pump-head assembly to be replaced.
This can save money when the motor and drive remain healthy.
However, inspect the rest of the pump first.
If freezing caused the crack, other internal components may also be damaged.
A complete pump replacement may provide better value in that situation.
Replace the Complete Water Pump
Sometimes rebuilding simply does not make sense.
Consider replacing the whole pump when:
- The main housing is cracked.
- Several internal components are damaged.
- Freeze damage is extensive.
- The motor is also failing.
- Water has entered electrical components.
- Repair parts are unavailable.
- Previous repairs keep failing.
- The pump is already old.
- Repair costs approach replacement cost.
Match the new pump to your RV’s plumbing requirements.
Check flow rate, pressure rating, electrical demand, fittings, and physical size.
Can You Just Tighten the Pump-Head Screws to Stop the Leak?
Yes, tightening the screws can stop a leak caused by loose hardware. However, it will not repair a damaged diaphragm, cracked housing, leaking pressure switch, or worn seal.
This is where people sometimes make the problem worse.
They see another drop and tighten the screws harder.
Eventually, the plastic housing becomes damaged.
Tighten evenly and conservatively. If the leak remains, stop tightening and inspect deeper.
The screws should compress the head properly, not repair damaged parts.
Why Does My RV Water Pump Leak After Winterization?
A pump leaking after winter storage often suffered damage from trapped water.
Proper winterization itself normally does not damage the pump. Problems happen when water remains trapped inside components during freezing weather.
That water expands when frozen.
Even a small amount can crack plastic or distort internal components.
When spring arrives, the damaged pump may look normal while dry.
Once you fill the freshwater tank and pressurize the system, leaking begins.
Inspect the pump carefully if the problem appeared during dewinterization.
Look for:
- Tiny cracks around ports
- Cracked strainer housing
- Distorted pump-head plastic
- Leaking diaphragm areas
- Damaged fittings
- Loose connections
Do not assume adding more sealant will solve freeze damage.
A cracked structural component should usually be replaced.
Why Does the Pump Head Leak Only When I Use City Water?
City water can expose leaks that your freshwater pump does not immediately reveal.
When connected to campground water, your RV plumbing remains continuously pressurized. A weak fitting or damaged pump component may start leaking under that sustained pressure.
Start by disconnecting city water.
Then operate the freshwater pump and compare what happens.
If the leak only appears with city water, check:
- Incoming water pressure
- Your pressure regulator
- Pump inlet and outlet fittings
- Internal check-valve components
- Pump-head seals
- Nearby plumbing connections
Do not automatically blame the check valve.
The important clue is that city-water pressure is exposing something that cannot hold pressure reliably.
Using an appropriate RV water-pressure regulator can also protect your plumbing system.
Should I Repair the Pump Head or Replace the Whole Water Pump?
You do not always need a complete new pump. The condition of the housing, motor, and repair parts should guide your decision.
Repair the Pump Head When:
- The motor still runs smoothly.
- Water flow was normal before the leak.
- The plastic housing is not cracked.
- The leak is isolated to one serviceable component.
- A correct repair kit is available.
- The pump is otherwise in good condition.
- Repair cost is significantly lower than replacement.
A targeted repair can extend the pump’s usable life considerably.
Replace the Complete Pump When:
- The housing has freeze cracks.
- Several parts are damaged.
- Water entered the motor area.
- The pump struggles to build pressure.
- The pump is unusually noisy.
- Internal parts are badly worn.
- Rebuild parts are difficult to find.
- The pump repeatedly leaks after repairs.
- Replacement offers better overall value.
There is little benefit in rebuilding a pump with multiple developing problems.
Can You Keep Using an RV Water Pump That Leaks Around the Head?
I would not continue normal use with an active pump-head leak.
A slow drip may look harmless, but it can become worse quickly.
The pump could also struggle to maintain pressure. That can cause repeated cycling and additional wear.
Water around the pump can damage:
- Flooring
- Cabinet bases
- Insulation
- Wood framing
- Electrical connections
- Nearby stored items
Turn the pump off when you are not actively troubleshooting it.
Dry any standing water immediately.
If the leak is significant, avoid using the freshwater pump until repaired.
A small repair now can prevent a much larger RV water-damage problem.
How Do You Prevent Future RV Water Pump Head Leaks?
Most leaks cannot be prevented forever, but proper maintenance reduces the risk. Pay particular attention before freezing weather and after long travel days.
- Winterize the pump before freezing temperatures arrive.
- Follow your pump manufacturer’s winterization procedure.
- Drain trapped water from the plumbing system.
- Inspect fittings during spring dewinterization.
- Keep the pump inlet strainer clean.
- Check pump connections after rough trips.
- Never overtighten plastic fittings.
- Replace damaged fitting seals instead of forcing them tighter.
- Support plumbing so it does not pull against pump ports.
- Use flexible connections where your pump installation requires them.
- Maintain appropriate RV water pressure.
- Check the pump compartment periodically for moisture.
- Investigate unexplained pump cycling immediately.
- Repair slow leaks before they become larger.
I also like checking the pump before every long trip.
You do not need to dismantle anything.
Simply run several faucets, close them, and inspect around the pump.
That quick check can reveal a developing leak early.
When Should You Call an RV Technician?
Most external fitting leaks are manageable DIY repairs. Internal problems become more complicated when diagnosis or pump adjustment is required.
Consider calling an RV technician when:
- Water has reached electrical components.
- You cannot identify the leak source.
- The housing appears cracked in several places.
- The pump still leaks after rebuilding.
- The pump cannot maintain proper pressure.
- Internal adjustment appears necessary.
- Plumbing connections require significant modification.
- The pump is located in an unsafe access area.
- Hidden water damage may already exist.
- You are uncomfortable opening the pump head.
A technician can also pressure-test the plumbing system.
That helps when water appears around the pump but the actual leak remains hidden.
Final Words
A leak around your RV water pump head does not automatically mean the entire pump is finished.
Start by drying everything and finding the first wet location. That simple step can separate a loose fitting from an internal pump problem.
If the problem is a fitting, seal, switch, or serviceable diaphragm, repair may be straightforward. A cracked housing, extensive freeze damage, or multiple failing components usually makes replacement the better choice.
Most importantly, do not ignore a small leak.
RV pump compartments often sit above flooring, cabinets, and insulation. Fixing a few drops now can prevent expensive water damage later.
Related FAQs
Can You Replace Just the Head on an RV Water Pump?
Yes, some RV water pumps have replaceable pump-head assemblies or rebuild kits. Check the exact model number first because repair parts vary between manufacturers and individual pump models.
How Do I Know if My RV Water Pump Diaphragm Is Bad?
A damaged diaphragm may cause leaking around the pump head, weak water pressure, poor priming, repeated cycling, or difficulty reaching shutoff pressure. Opening the pump head may be necessary for confirmation.
Why Is Water Coming From My RV Water Pump Pressure Switch?
Water around the pressure-switch housing can come from a damaged switch diaphragm, loose housing screws, a compromised seal, or nearby water running across the pump body.
Can a Frozen RV Water Pump Start Leaking Later?
Yes. Freezing can create tiny cracks or damage internal diaphragms. The damage may not become obvious until you repressurize the plumbing system during spring dewinterization.
Should I Use Teflon Tape on RV Water Pump Fittings?
Not automatically. Some pump fittings use O-rings, tapered sealing surfaces, or specialized connectors that do not require thread tape. Follow the instructions for your exact pump and fitting style.
Why Does My RV Water Pump Keep Cycling After I Fix the Leak?
The system may still have another small leak, a loose fitting, trapped air, a failing check valve, pressure-switch trouble, or an internal pump problem preventing pressure from holding.
How Tight Should RV Water Pump Head Screws Be?
There is no universal torque value for every RV pump. Tighten the screws evenly according to your pump manufacturer’s specification and avoid overtightening plastic housing components.
Can Too Much Water Pressure Damage an RV Water Pump?
Excessive plumbing pressure can stress fittings, seals, check valves, and other water-system components. Use appropriate pressure regulation when connecting your RV to campground city water.
Does a Leaking Pump Head Mean I Need a New Pump?
Not always. Loose hardware, fittings, pressure-switch components, and diaphragms may be repairable. Replacement makes more sense when the housing is cracked or several components have failed.
Why Does My RV Water Pump Leak Only While Running?
A leak appearing only while running usually means pressure is opening a weak seal, crack, fitting, or pump-head seam. Dry the pump first and watch for the first wet point while it pressurizes.
Can a Loose RV Water Pump Fitting Look Like a Head Leak?
Absolutely. Water from an inlet or outlet fitting can travel along the pump housing before dripping underneath the head. Always inspect external fittings before opening the pump.
Is a Small RV Water Pump Leak an Emergency?
A few drops may not require immediate professional service, but the pump should be turned off and repaired promptly. Even a slow leak can eventually damage flooring, cabinets, insulation, or electrical components.

Steven Parker writes about everyday RV life, from setup tips to long-term living decisions. His content reflects a calm, experienced approach to RV ownership and travel. He focuses on comfort, reliability, and realistic expectations.