Your RV water pump usually blows a fuse when a faucet opens because the pump motor starts at that moment and draws excessive current. A failing motor, locked pump head, damaged wiring, electrical short, or incorrect fuse can cause the circuit to overload as soon as the pump tries to run.
The faucet itself normally is not causing the electrical problem. Below, I’ll help you use the timing of the blown fuse to narrow down the real cause, test the pump safely, and decide whether you have a pump problem or an RV wiring problem.
Key Takeaways
- Opening a faucet drops water pressure and tells the pump to start.
- The faucet itself normally does not cause the fuse to blow.
- A seized pump or failing motor can pull excessive current.
- Damaged positive wiring can create an immediate short to ground.
- Never install a larger fuse simply because the current fuse keeps blowing.
- Check the pump’s specified fuse and electrical requirements before replacing parts.
- Disconnecting the pump can help separate pump problems from RV wiring faults.
- A fuse that blows only when the motor starts provides an important diagnostic clue.
Why Does Opening the Faucet Make the Fuse Blow?
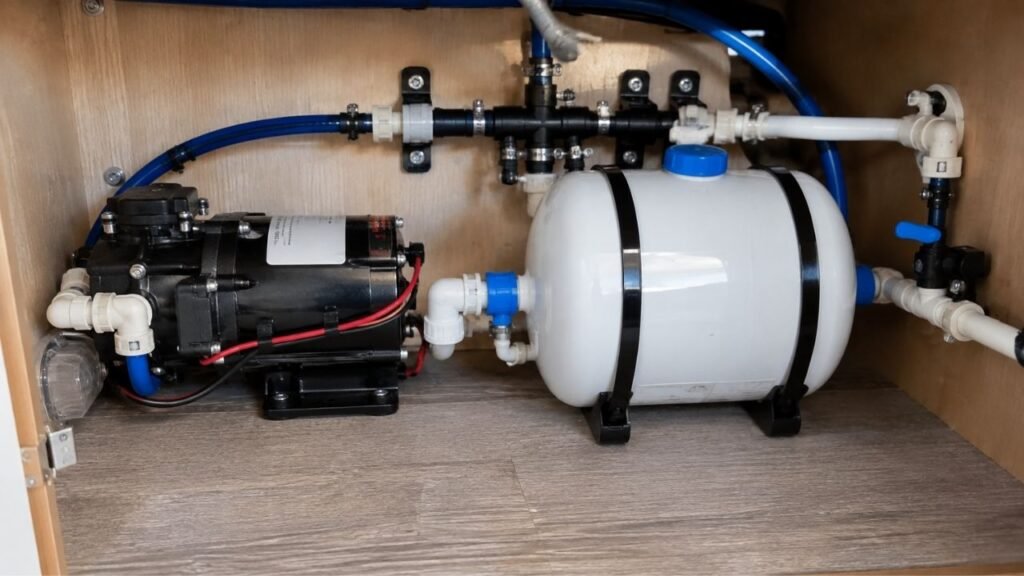
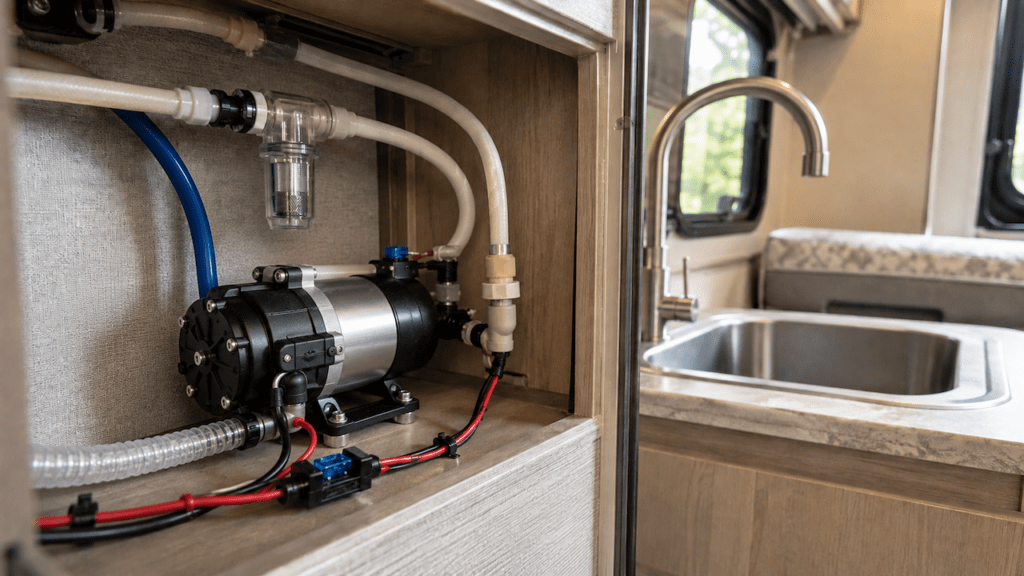
Your RV water pump is usually a demand-style 12-volt pump. It waits until pressure inside the plumbing drops before switching itself on.
With every faucet closed, the plumbing stays pressurized. The pressure switch inside or attached to the pump senses that pressure and keeps the motor off.
Once you open a faucet, water pressure drops.
The pressure switch detects that drop and closes the electrical circuit. Your pump motor suddenly receives power and begins drawing current.
Under normal conditions, nothing unusual happens.
But suppose the motor is failing, the pump mechanism is jammed, or a power wire has developed a short. Current can rise beyond what the circuit is designed to handle.
The fuse then opens to protect the wiring.
That is why it can seem as though opening your kitchen or bathroom faucet is blowing the fuse.
In reality, opening the faucet is simply the event that commands the pump motor to start.
This distinction matters because it tells you where to begin troubleshooting.
What the Timing of the Blown Fuse Can Tell You
When the fuse blows can reveal almost as much as the fuse itself. Pay close attention to what happens immediately before it fails.
| When the RV Water Pump Fuse Blows | More Likely Cause | What I Would Check First |
| Immediately after opening a faucet | Locked pump, failing motor, internal short | Pump motor and pump head |
| The instant the pump switch turns on | Wiring short, pump short, controller fault | Pump wiring and electrical circuit |
| After the motor hums briefly | Stalled motor or jammed pump assembly | Pump head and motor |
| Several seconds after water starts flowing | Excessive motor current or voltage problem | Current draw and pump voltage |
| After several minutes | Overheating motor or intermittent fault | Motor temperature and connections |
| Only occasionally | Chafed wiring or loose connector | Wiring harness and terminals |
| After winter storage | Freeze-damaged or seized pump | Pump head and diaphragm assembly |
| Only while operating from the battery | Voltage drop or weak electrical supply | Battery, terminals, and wiring |
| Even with the pump disconnected | RV wiring or another circuit component | Pump switch, wiring, controller |
Don’t skip this observation.
Replacing parts without noticing when the fuse actually blows can turn a relatively simple diagnosis into an expensive guessing game.
Most Likely Reasons an RV Water Pump Blows Its Fuse
Several faults can overload an RV water pump circuit. I recommend checking the electrical and mechanical causes systematically rather than immediately replacing the pump.
The Water Pump Motor Is Failing
A worn pump motor is one of the first things I would suspect when the fuse survives until the pump attempts to run.
Electric motors naturally draw more current when starting.
However, a healthy RV water pump should still remain within the limits designed for its electrical circuit.
As motors age, their internal windings, brushes, bearings, or other components can deteriorate.
You may notice:
- A burning electrical smell
- A motor that becomes unusually hot
- Slower pump operation
- Intermittent starting
- Grinding or rough noises
- A pump that hums without moving water
- Repeated blown fuses
A failing motor may work intermittently before completely stopping.
That can make the problem confusing because one faucet opening might work while the next attempt blows the fuse.
The Pump Head or Motor Is Mechanically Stuck
An electric motor draws significantly more current when something prevents it from rotating normally.
That makes a mechanically locked pump an important possibility.
A diaphragm-style RV pump contains moving components that repeatedly flex and move water through the pump head.
Debris, internal damage, dried components, corrosion, or freeze damage can keep those parts from moving correctly.
The motor still tries to turn.
Because it cannot move normally, its current rises sharply.
Eventually, the fuse opens.
A short humming sound immediately before the fuse blows is an especially useful clue.
A Positive Wire Is Shorting to Ground
RV wiring lives in a difficult environment.
Every trip introduces vibration, bumps, movement, temperature changes, and moisture.
Over time, a positive pump wire can rub against:
- Metal framing
- Cabinet edges
- Mounting screws
- Plumbing brackets
- Pump mounting hardware
- Other electrical components
Eventually, the insulation can wear through.
Once exposed copper touches grounded metal, current takes an unintended path directly toward ground.
The fuse may blow instantly.
Inspect the entire visible pump wiring harness rather than looking only at the connector attached to the motor.
Intermittent shorts are especially tricky.
A damaged wire may only touch metal when the pump vibrates during startup.
The Pump’s Internal Pressure Switch Has a Fault
The pressure switch tells your demand pump when to start and stop.
Opening a faucet lowers plumbing pressure. The switch responds by completing the motor circuit.
A pressure-switch problem can therefore become noticeable exactly when you open a faucet.
However, there is an important distinction.
A pressure switch that simply stays closed more commonly makes a pump run continuously. It does not automatically mean the fuse will blow.
For a fuse problem, I would look for electrical damage around the switch, such as:
- Burned contacts
- Melted connectors
- Damaged switch wiring
- Moisture intrusion
- Internal shorting
- Overheated terminals
Don’t automatically replace the pressure switch just because the fuse blows when pressure drops.
Test the broader circuit first.
The Fuse or Circuit Does Not Match the Pump
This issue frequently appears after someone replaces the original water pump.
The new pump may physically fit and connect to the existing plumbing while requiring different electrical protection.
That can create trouble.
You should confirm:
- Pump voltage
- Rated current
- Recommended circuit protection
- RV wiring size
- Controller requirements
- Existing fuse rating
Don’t assume every RV water pump needs the same fuse.
Some pumps use relatively modest current, while larger pumps require significantly more.
Your RV manufacturer or pump manufacturer should determine the correct circuit protection.
Never solve a repeatedly blown fuse by simply installing the next larger size.
The Pump Circuit Has Excessive Voltage Drop
Poor electrical connections can create another layer of trouble.
Common causes include:
- Corroded terminals
- Weak battery connections
- Poor crimp connectors
- Undersized wiring
- Long wire runs
- Loose grounds
- Damaged switches
Testing the battery while nothing is running doesn’t always reveal this problem.
A battery might show acceptable voltage with the pump off but experience significant voltage loss once the motor starts.
That is why voltage at the actual pump during operation is more informative.
Look closely at both the positive and negative sides of the circuit.
Freeze Damage Has Locked the Pump
If this problem appeared immediately after winter storage, inspect the pump carefully.
Residual water can freeze inside the pump head.
Expanding ice may damage:
- Diaphragms
- Valves
- Pump housing
- Internal seals
- Moving pump components
Sometimes the pump won’t show an obvious external crack.
Instead, the internal mechanism becomes damaged or jammed.
When spring arrives, the motor receives power but cannot move correctly.
The resulting high current can blow the fuse.
If your pump worked normally before winter and immediately started blowing fuses afterward, this possibility should move higher on your troubleshooting list.
Can a Clogged Water Line Actually Blow the Water Pump Fuse?
A severely restricted water system can affect pump performance, but I would not make an ordinary clogged faucet or aerator my first suspect when the fuse blows immediately.
Problems worth checking include:
- Clogged pump inlet strainer
- Kinked inlet hose
- Closed freshwater valve
- Incorrect winterization valve position
- Collapsed flexible hose
- Heavy debris inside the pump
- Severe plumbing restriction
These problems can make the pump behave abnormally.
However, an immediate electrical fuse failure usually pushes me toward the motor, pump mechanism, wiring, or electrical circuit first.
For example, a dirty faucet aerator might reduce flow.
It normally should not create a direct electrical short.
If you’re troubleshooting a fuse that opens immediately when the motor tries starting, investigate the electrical load before spending hours disassembling every faucet.
How to Troubleshoot an RV Water Pump Fuse That Keeps Blowing
The easiest approach is to eliminate one possibility at a time. These steps move from simple checks toward electrical and pump-specific testing.
Before touching the wiring, switch off the pump and disconnect the appropriate 12-volt power source when required. If you’re uncomfortable testing DC circuits, have an RV technician handle the electrical diagnosis.
Step 1: Stop Replacing Fuses Repeatedly
I know replacing the fuse is tempting.
You install another one, open the faucet, and hope the system suddenly decides to behave.
But if the replacement fuse blows again, stop.
A fuse is a safety device.
It is protecting the circuit from excessive current that could otherwise damage wiring or create excessive heat.
Repeatedly feeding new fuses into the same fault won’t repair anything.
Instead, use the blown fuse as evidence that something downstream needs attention.
Step 2: Verify the Correct Fuse Before Testing
Before troubleshooting further, make sure the installed fuse is actually correct.
Check:
- RV owner’s manual
- 12V fuse-panel label
- Pump identification label
- Pump installation documentation
- Previous service records, if available
You may discover that somebody previously installed an undersized replacement fuse.
You may also discover the opposite problem.
Someone might already have installed a fuse larger than the circuit was designed to safely carry.
Neither situation should be ignored.
Use the circuit protection specified for your particular installation.
Step 3: Note Exactly When the Fuse Blows
Now reproduce the symptom carefully.
Ask yourself:
Does the fuse blow when you turn the pump switch on?
Or does everything remain normal until you open a faucet?
Does the pump hum first?
Does it run water for two or three seconds?
Does the problem happen only with a partly open faucet?
Does it happen only after the pump gets warm?
Write down what happens.
The more precisely you identify the sequence, the easier the diagnosis becomes.
Step 4: Inspect the Pump and Wiring Visually
Turn the system off and examine everything you can reach.
Look for:
- Bare copper
- Cracked insulation
- Melted connectors
- Loose terminals
- Discolored wiring
- Corrosion
- Water around electrical components
- Crushed wires
- Pinched harnesses
- Rodent damage
- Burned plastic
- Electrical odor
Pay particular attention where wires pass through holes, metal brackets, or cabinet panels.
Vibration can slowly wear insulation away in these locations.
Gently inspect connectors for looseness as well.
A connector should not move freely on its terminal.
Step 5: Disconnect the Pump to Separate Pump Failure From RV Wiring
This is one of the most useful diagnostic steps.
Switch off the 12V supply first.
Then identify and disconnect the pump’s electrical leads according to your RV and pump wiring configuration.
Keep disconnected conductors safely separated and insulated.
Now you’ve separated the actual pump from the RV-side circuit.
What happens next provides an important clue.
If the circuit protection no longer fails with the pump removed from the circuit, the pump itself or its attached wiring moves much higher on the suspect list.
If the fuse still fails without the pump connected, the problem is probably somewhere else.
Possible locations include:
- Supply wiring
- Pump switch
- Pump controller
- Damaged harness
- Shared electrical load
This test can save you from buying a new pump unnecessarily.
Step 6: Check Voltage at the Pump Under Load
A basic voltage check is helpful, but the timing matters.
Measuring approximately 12 volts while nothing is operating doesn’t prove the pump is receiving adequate voltage while running.
Voltage should be checked at the pump while the circuit is under load.
Watch for a significant drop when the motor tries starting.
If voltage collapses, inspect:
- Battery condition
- Battery terminals
- Ground connection
- Positive wiring
- Fuse holder
- Pump switch
- Splices and crimp connectors
Corrosion hidden inside a crimp can create surprisingly large resistance.
Step 7: Compare Pump Current With Its Rated Specification
Current testing can tell you whether the motor is demanding more electricity than it should.
First, find the pump’s rated electrical specification.
Then use an appropriate DC current measuring method.
A DC clamp meter is particularly convenient because you can measure current around the conductor without placing an ordinary meter directly in series with a potentially overloaded circuit.
If measured current rises far beyond the pump’s specification, suspect:
- Failing motor
- Locked pump
- Internal mechanical restriction
- Damaged pump components
Don’t keep the pump energized while it is pulling excessive current.
You have already learned what you needed from that test.
Step 8: Check Whether the Pump Can Operate Freely
Disconnect electrical power before inspecting the mechanical side.
Follow the manufacturer’s service procedure for your specific pump.
Some pumps have serviceable heads and diaphragm assemblies.
Others are better replaced than disassembled.
Look for:
- Debris
- Damaged diaphragm
- Frozen components
- Cracks
- Jammed valves
- Corrosion
- Distorted parts
If the motor cannot move the pump mechanism freely, excessive starting current becomes very likely.
Step 9: Check the Strainer and Nearby Plumbing
Once the major electrical problems have been investigated, check the water supply path.
Start at the freshwater tank and work toward the pump.
Inspect:
- Tank outlet
- Shutoff valves
- Winterization valve
- Pump inlet hose
- Inlet strainer
- Pump outlet
- Nearby flexible hoses
Clean a clogged inlet strainer.
Straighten kinked hoses.
Make sure every required valve is positioned correctly.
A healthy pump needs an unrestricted supply of water.
Step 10: Decide Whether the Pump or Circuit Needs Repair
At this point, your findings should point in a much clearer direction.
If the fuse survives after the pump is disconnected, concentrate on the pump.
If the fuse still blows with the pump electrically removed, trace the RV-side electrical circuit.
If pump current is abnormally high, investigate the motor and pump head.
If voltage falls dramatically under load, investigate the power supply and wiring.
If the pump started failing immediately after freezing weather, inspect for mechanical damage.
Troubleshooting this way prevents unnecessary parts replacement.
Quick Pump-or-Wiring Diagnosis
You can use the following shortcuts after completing the basic safety checks.
- Fuse blows with the pump disconnected: Inspect RV wiring, switches, controllers, and shared loads.
- Fuse blows only with the pump connected: The pump motor or internal pump assembly becomes the main suspect.
- Pump hums before the fuse blows: Look for a stalled motor or jammed pump mechanism.
- Pump runs briefly before blowing the fuse: Check operating current, voltage, overheating, and mechanical resistance.
- Problem started after winter: Inspect the pump head for freeze damage.
- New pump causes the exact same failure: Diagnose the RV electrical circuit before buying another pump.
- Voltage drops heavily during startup: Inspect battery supply, connections, wire size, and grounds.
- Wiring gets hot: Shut the system down and investigate immediately.
What If the Fuse Blows Only When One Faucet Opens?
This situation can make that particular faucet look guilty, but remember how an RV demand pump works.
The faucet normally has no electrical connection to the pump.
Opening it simply changes plumbing pressure.
It may be the only faucet that creates enough pressure drop to trigger the pump immediately.
Another faucet might have lower flow and allow the pressure switch to react differently.
If one fixture consistently creates the problem, check that fixture for a severe restriction.
But don’t stop there.
The more important question remains whether the pump draws excessive current when it starts.
A marginal pump motor can appear normal until a certain water-demand condition causes it to start or cycle differently.
What If the Pump Fuse Blows Only on Battery Power?
Your RV water pump normally operates from the 12V system, even when your RV can also use campground shore power.
When connected to shore power, your converter may support the 12V system.
That can make electrical conditions different from running on the house battery alone.
If the fuse problem appears only while boondocking or operating from battery power, inspect:
- Battery state of charge
- Battery terminals
- Ground connections
- Main 12V connections
- Pump voltage during startup
- Wiring voltage drop
Don’t immediately assume the battery itself is causing the fuse to blow.
Instead, treat the difference between battery operation and converter-supported operation as another troubleshooting clue.
Can a Bad Ground Cause an RV Water Pump Fuse to Blow?
A poor ground and a direct short to ground are not the same problem.
A loose or corroded ground commonly causes:
- Low voltage
- Intermittent operation
- Weak pump performance
- Motor hesitation
- Excessive voltage drop
A positive wire touching grounded metal is different.
That creates a short circuit capable of blowing the fuse almost instantly.
So when someone says, “Check the ground,” determine what they actually mean.
Inspect the negative connection for looseness and corrosion.
Then inspect positive wiring separately for places where it might contact metal.
Should I Install a Larger Fuse for My RV Water Pump?
No. Don’t increase the fuse size simply because your existing fuse keeps blowing.
The fuse protects the wiring and other circuit components from excessive current.
Installing a larger fuse can allow the wiring to carry more current than it was designed to handle.
That creates unnecessary heat and potentially serious electrical damage.
Instead, identify the correct fuse specified for your RV and pump configuration.
If your current fuse matches the specification and continues blowing, something is wrong.
Find the problem rather than increasing the protection limit.
This becomes especially important after installing a replacement water pump.
If the new pump requires a different circuit than your RV currently provides, changing only the fuse is not automatically a safe solution.
The complete circuit must be appropriate for the pump.
Mistakes to Avoid While Troubleshooting a Blowing Pump Fuse
Electrical troubleshooting becomes much easier when you avoid shortcuts that hide the actual problem.
- Don’t replace the fuse repeatedly without investigating the overload.
- Don’t install a larger fuse as an experiment.
- Don’t bypass the fuse.
- Don’t assume every RV water pump uses the same fuse size.
- Don’t replace the pump before separating pump and wiring faults.
- Don’t ignore melted connectors or hot wires.
- Don’t keep powering a motor that only hums.
- Don’t ignore freeze damage after winter storage.
- Don’t assume a clogged faucet automatically caused the electrical failure.
- Don’t test unidentified wires by randomly connecting them together.
- Don’t leave a pressure switch bypassed during normal operation.
- Don’t continue using wiring with visible heat damage.
Taking an extra few minutes here can prevent a much larger repair.
When Does the RV Water Pump Need to Be Replaced?
Not every blown fuse means you need a new water pump. Replacement makes more sense when testing clearly points back to the pump itself.
Consider replacing the pump when:
- The motor draws considerably more current than specified.
- The motor has an internal electrical short.
- The pump repeatedly stalls.
- You smell burned electrical insulation.
- The motor quickly becomes excessively hot.
- The pump was damaged by freezing.
- Internal components are badly worn.
- The motor bearings grind or bind.
- Repair parts aren’t available.
- Repairing the pump costs nearly as much as replacement.
When choosing a replacement, don’t look only at gallons per minute.
Match the important specifications:
- Operating voltage
- Flow rate
- Pressure rating
- Electrical current requirements
- Circuit protection
- Wiring requirements
- Mounting space
- Plumbing connections
A pump that fits the hoses isn’t necessarily electrically compatible with your RV.
When the Pump Is Probably Not the Problem
It is easy to blame the pump because that’s the component you can hear. Several clues can tell you the real fault is probably somewhere else.
- The fuse still blows after the pump has been electrically disconnected.
- A replacement pump develops exactly the same problem.
- Another device on the same circuit also behaves abnormally.
- Wiring becomes hot before reaching the pump.
- You can see damaged insulation in the RV harness.
- The fuse blows while the pump isn’t being commanded to operate.
- Pump voltage is unstable because of an upstream connection.
- The pump runs normally when powered through a properly protected independent test setup performed by a qualified person.
If you find these symptoms, concentrate on the RV’s electrical circuit instead of purchasing another pump.
When Should You Stop Troubleshooting and Call an RV Technician?
Many RV owners can handle basic fuse, wiring, and pump inspections. Some failures are better left to someone experienced with RV electrical systems.
Consider professional help when:
- The fuse blows instantly every time.
- Wiring disappears behind finished walls.
- Insulation has visibly melted.
- A connector has burned badly.
- The circuit powers several different devices.
- Your RV uses multiple pump switches or a pump controller.
- Previous owners modified the wiring.
- You aren’t comfortable measuring electrical current.
- A replacement pump also blows the fuse.
- The problem remains after the pump has been isolated.
There’s nothing wrong with stopping once troubleshooting moves beyond your tools or electrical experience.
The important thing is avoiding repeated fuse failures while the underlying fault remains present.
Final Verdict
If your RV water pump blows a fuse when a faucet opens, don’t start by blaming the faucet. Opening the faucet drops plumbing pressure, which tells the demand pump to switch on. The fuse blows because something abnormal happens when that electrical load starts.
I would begin by confirming the correct fuse, observing exactly when it blows, and inspecting the wiring. Then isolate the pump from the RV circuit. That one step can often tell you whether you should investigate the pump itself or continue tracing the coach wiring.
A motor that hums, stalls, overheats, or draws excessive current is a strong pump-related clue. A fuse that still blows with the pump disconnected points you toward the RV’s wiring, switches, controllers, or other circuit components.
Most importantly, don’t solve this problem with a bigger fuse. Find the reason the proper fuse is protecting the circuit, and you’ll fix the actual problem rather than hiding it.
Related FAQs
Why Does My 15-Amp RV Water Pump Fuse Keep Blowing?
If a 15-amp fuse is the correct protection for your particular pump circuit and it keeps blowing, the circuit is drawing excessive current. A failing motor, seized pump assembly, electrical short, damaged wiring, or another fault on the circuit should be investigated before installing another fuse.
Can a Frozen RV Water Pump Blow a Fuse?
Yes. Water left inside the pump can freeze and damage or jam its internal components. When the motor later tries to start against a locked pump mechanism, its current can rise enough to blow the fuse.
Can a Bad RV Water Pump Pressure Switch Blow a Fuse?
A damaged pressure switch can contribute to electrical problems if its wiring, terminals, or contacts have shorted or overheated. However, a pressure switch that simply remains on is more likely to cause continuous pump operation than an immediate blown fuse.
Why Does My RV Water Pump Hum and Then Blow the Fuse?
A humming pump that quickly blows a fuse often indicates the motor is receiving power but cannot rotate normally. A seized pump head, damaged motor, jammed internal component, or severe mechanical resistance should be investigated.
Can Low Battery Voltage Make an RV Water Pump Blow a Fuse?
Low voltage is more commonly associated with poor pump performance and excessive voltage drop than a simple fuse failure. However, abnormal supply conditions can affect motor operation, so check voltage at the pump while it is trying to run.
How Do I Know if My RV Water Pump Motor Is Bad?
Common signs include excessive current draw, overheating, electrical odor, grinding, intermittent starting, humming without pumping, repeated fuse failures, or a motor that fails even when proper voltage and wiring have been confirmed.
What Fuse Size Should an RV Water Pump Use?
Use the fuse or circuit protection specified for your particular RV and water pump installation. There is no single fuse size that is correct for every RV water pump, so verify the pump documentation and RV electrical specifications.
Can a Clogged RV Water Pump Strainer Blow the Fuse?
A badly clogged strainer can restrict water entering the pump and affect performance, but an immediate fuse failure usually deserves electrical and mechanical investigation first. Clean the strainer while troubleshooting, but don’t automatically assume it caused the blown fuse.
Why Does a New RV Water Pump Still Blow the Fuse?
If a correctly installed replacement pump causes the same fuse failure, inspect the RV wiring, supply voltage, ground connection, switches, controller, circuit protection, and pump compatibility before assuming the new pump is defective.
Is It Safe to Put a Larger Fuse in an RV Water Pump Circuit?
No, not simply to stop the existing fuse from blowing. The fuse protects the wiring from excessive current. Installing a larger fuse without confirming that the entire circuit is designed for it can allow dangerous overheating and electrical damage.

Steven Parker writes about everyday RV life, from setup tips to long-term living decisions. His content reflects a calm, experienced approach to RV ownership and travel. He focuses on comfort, reliability, and realistic expectations.