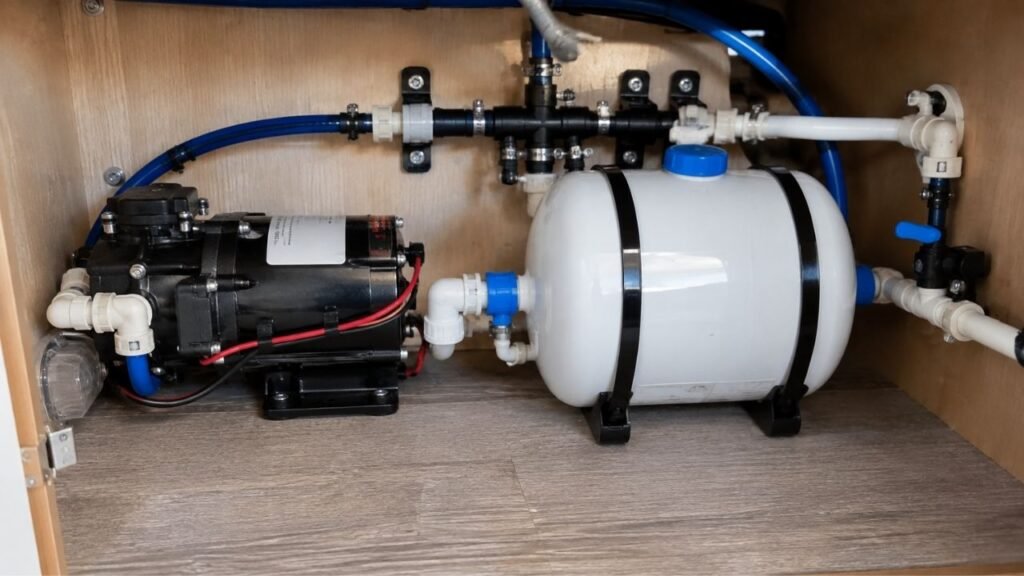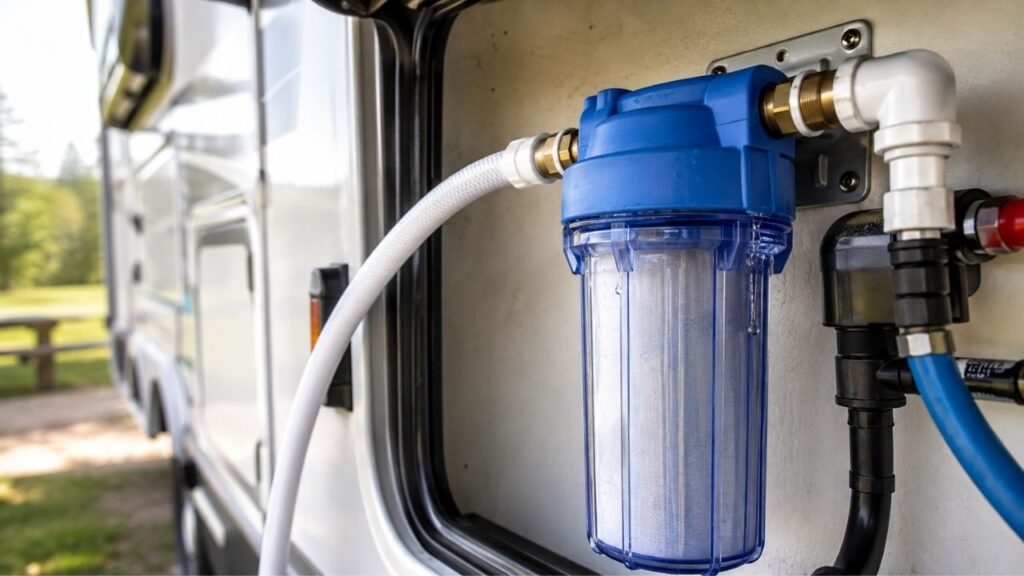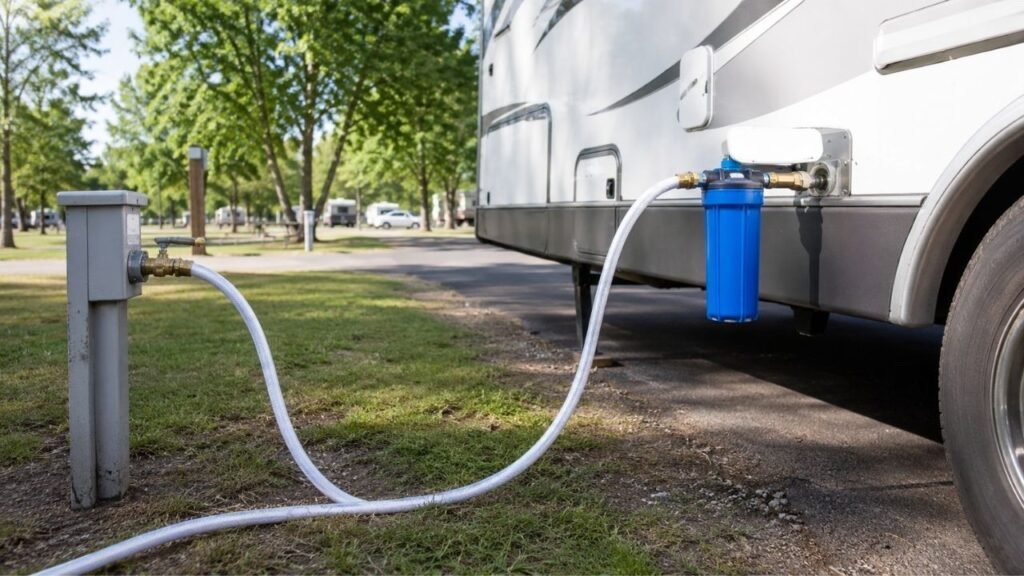
Set an RV accumulator tank according to your water pump’s cut-in pressure. A common starting point is about 2 to 3 PSI below the pump’s cut-in pressure. However, some accumulator manufacturers recommend matching the cut-in pressure exactly. Always check your tank instructions before making the final adjustment.
The actual adjustment is fairly simple once you know the target pressure. I’ll show you how to find that number, safely depressurize your RV, adjust the air charge, and troubleshoot problems afterward.
Key Takeaways
- Set accumulator pressure according to your pump’s cut-in pressure.
- Many tanks work well about 2 to 3 PSI lower.
- Some manufacturers recommend matching cut-in pressure instead.
- Never check pre-charge while the water system remains pressurized.
- Turn off the pump and leave a faucet open first.
- A bicycle pump provides better control than a large compressor.
- Recheck the setting if pump cycling or pulsation returns.
What PSI Should an RV Accumulator Tank Be Set At?
There is no single PSI setting that works correctly for every RV. Your target depends mainly on the pump’s cut-in pressure and accumulator specifications.
For many common bladder-style accumulator tanks, you can start around 2 to 3 PSI below the pump’s cut-in pressure.
| RV Water Pump Cut-In Pressure | Example Accumulator Setting | What You Should Do |
| 20 PSI | 17–18 PSI | Confirm the tank manual |
| 25 PSI | 22–23 PSI | Confirm the tank manual |
| 30 PSI | 27–28 PSI | Confirm the tank manual |
| 35 PSI | 32–33 PSI | Confirm the tank manual |
| 40 PSI | 37–38 PSI | Confirm the tank manual |
These numbers are examples, not universal specifications.
If your accumulator manufacturer recommends matching the pump cut-in pressure, follow that instruction instead.
For example, if your pump starts around 30 PSI, you might use 27 to 28 PSI. Another tank may require the full 30 PSI.
The safest approach is simple. Determine your actual pump cut-in pressure first. Then check the accumulator manufacturer’s recommendation before adding air.
Why You Need the Pump’s Cut-In Pressure First
Your pump may have several different pressure ratings listed. Knowing which one matters prevents you from overcharging the accumulator.
What Is Water Pump Cut-In Pressure?
Cut-in pressure is where your RV water pump starts running.
Suppose you open the kitchen faucet. Water pressure slowly drops inside the plumbing system. Once pressure reaches the pump’s cut-in setting, the pump activates.
You may also see this called:
- Turn-on pressure
- Restart pressure
- Pressure-switch activation pressure
This is normally the pressure used when setting an accumulator tank.
What Is Water Pump Cut-Out Pressure?
Cut-out pressure is where the pump shuts itself off.
Once all faucets are closed, the pump continues building water pressure. When pressure reaches the cut-out setting, the pressure switch stops the motor.
Cut-out pressure is normally higher than cut-in pressure.
A pump advertised as a “45 PSI pump” may reach approximately 45 PSI before stopping. However, it could restart at a considerably lower pressure.
The exact numbers depend on your particular pump model.
Why You Shouldn’t Use the Pump’s Maximum PSI
One common mistake is reading the largest PSI number printed nearby.
That number might represent maximum pressure or shutoff pressure instead.
Your accumulator normally needs to work around pump cut-in pressure.
For example, filling an accumulator to 45 PSI because your pump says 45 PSI could be excessive when the pump actually starts around 30 PSI.
Always identify what the listed pressure represents before adjusting anything.
How Do You Find Your RV Water Pump’s Cut-In Pressure?
Sometimes the cut-in pressure is clearly listed. Other times, you may need to measure it yourself using a pressure gauge.
Check the Pump Label and Owner’s Manual First
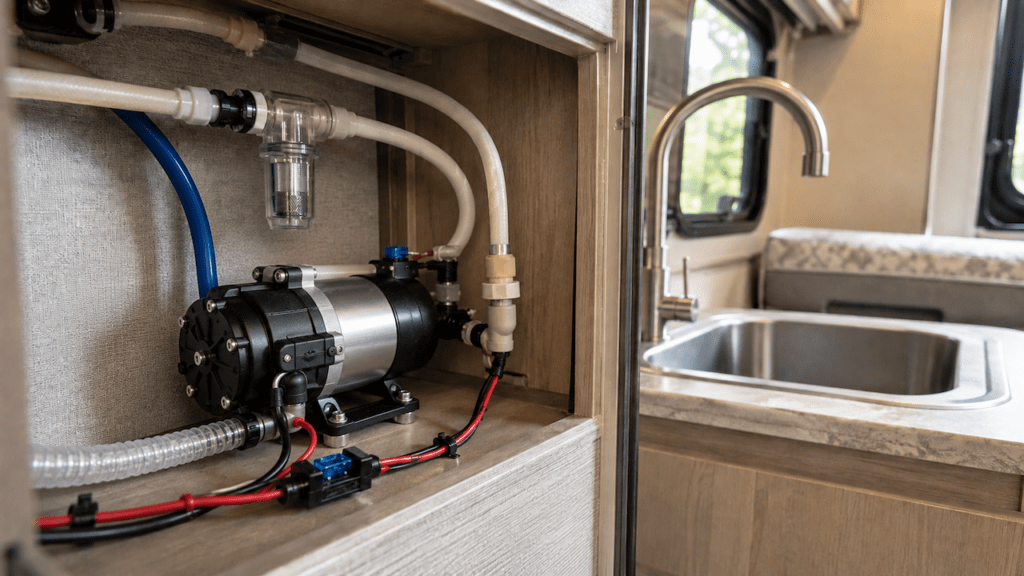
Start by locating your RV water pump.
You can commonly find it near:
- The freshwater tank
- A basement storage compartment
- Beneath a bed
- Inside a cabinet
- Behind an access panel
Look for the manufacturer and model number.
Check the specifications for terms including:
- Cut-in pressure
- Turn-on pressure
- Restart pressure
- Pressure-switch setting
Do not automatically assume the largest PSI number is cut-in pressure.
Measure the Cut-In Pressure If It Isn’t Listed
You can measure pump cut-in pressure using an appropriate water-pressure gauge.
Follow these general steps:
- Connect the gauge on the pressurized side of the system.
- Turn your RV water pump on.
- Allow the pump to build full pressure.
- Wait until the pump shuts itself off.
- Slowly open a faucet.
- Watch the pressure gauge begin dropping.
- Note the pressure where the pump starts running.
- Repeat the test to confirm the reading.
Suppose the pump repeatedly starts around 30 PSI. That is approximately your cut-in pressure.
You can now use that value when checking accumulator specifications.
Avoid adjusting the pump’s pressure switch unless the manufacturer allows adjustment.
Changing the switch unnecessarily can create additional water-system problems.
What Do You Need to Adjust an RV Accumulator Tank?
You only need a few basic items for this job.
- Low-pressure tire gauge
- Bicycle pump or hand pump
- Accumulator tank instructions
- Water pump specifications
- Water-pressure gauge if cut-in pressure remains unknown
I prefer a bicycle pump for small RV accumulator tanks.
These tanks contain relatively little air volume. A powerful compressor can increase pressure extremely quickly.
A hand pump gives you much better control.
How Do You Set the Air Pressure in an RV Accumulator Tank?
Setting the pressure takes only several steps. The most important part is completely removing water-side pressure before checking the air charge.
Step 1: Turn Off the RV Water Pump
Switch your RV water pump off.
If you are working around exposed electrical connections, disconnect its power supply.
You do not want the pump restarting while pressure is released.
Also disconnect campground water if your RV remains connected.
The plumbing system must not receive outside water pressure during this procedure.
Step 2: Relieve All Water Pressure
Open a faucet inside your RV.
Allow water to run until pressure disappears completely.
Leave at least one faucet open while checking the accumulator.
This step matters more than many RV owners realize.
The accumulator contains air on one side and water on another. Water pressure pushes against the bladder or diaphragm.
If water pressure remains trapped, your tire gauge may show a misleading reading.
You are trying to measure the tank’s pre-charge pressure.
That measurement should be taken with zero water-side pressure.
Step 3: Locate the Accumulator Air Valve
Find the air valve on your accumulator tank.
It normally looks similar to a tire valve. This type is commonly called a Schrader valve.
Remove its protective cap.
Do not confuse the air valve with the plumbing connection.
The plumbing connection carries water. The Schrader valve is where you check and adjust the air charge.
Step 4: Check the Existing Air Pressure
Press your tire-pressure gauge onto the valve.
Write down the reading before making adjustments.
Knowing the original pressure can help with troubleshooting later.
Suppose your target is 28 PSI but the gauge shows 15 PSI. The tank has probably lost some pre-charge.
A slight change over a long period may be normal.
A tank that repeatedly loses significant pressure needs closer inspection.
Step 5: Calculate Your Target Pressure
Next, determine the target using your accumulator instructions.
For tanks using the common 2-to-3-PSI-below method:
Target accumulator pressure = pump cut-in pressure − 2 to 3 PSI
Here is an easy example.
Your pump starts at 30 PSI.
You might set the accumulator around 27 to 28 PSI.
However, don’t automatically use that formula on every tank.
Some accumulator manufacturers recommend setting pre-charge equal to the pump’s cut-in pressure.
The tank manufacturer’s specification should take priority.
Step 6: Add or Release Air
Use a bicycle pump or hand pump to increase pressure.
Add air gradually.
Small accumulator tanks respond quickly, so avoid large pressure increases.
Check the gauge after several pump strokes.
If the pressure is too high, briefly press the valve core.
A small amount of air should escape.
Then check pressure again.
Continue until you reach your target.
Step 7: Recheck the Pressure
Take another measurement before closing everything.
I like checking it twice.
Tire gauges can release a tiny amount of air during testing. Small tanks can react more noticeably than automotive tires.
Make a small correction if necessary.
Once the reading remains stable, your pre-charge adjustment is finished.
Step 8: Reinstall the Valve Cap and Repressurize the System
Replace the air-valve cap.
Tighten it securely by hand without forcing it.
Close the faucet you previously left open.
Restore power to the water pump.
The pump should start and pressurize the plumbing system.
Allow it to stop normally.
Then test several faucets at different flow settings.
Pay particular attention to low-flow operation.
That is where an accumulator often makes the biggest difference.
How Can You Tell If the Accumulator Pressure Is Correct?
A correctly adjusted accumulator should make your RV water system feel smoother. You should also notice changes in how often the pump runs.
The Pump Should Cycle Less Often
Open a faucet slightly.
A properly working accumulator can provide a small amount of stored pressurized water before the pump starts.
This reduces unnecessary short cycling.
You should notice longer periods between pump starts during small water demands.
Faucet Flow Should Feel Smoother
Accumulator tanks help absorb pulsations created by diaphragm pumps.
Water should feel steadier at the faucet.
You may notice the biggest improvement when using:
- Bathroom faucets
- Kitchen faucets
- Low-flow shower settings
- Small nighttime water draws
The accumulator cannot fix every water-flow problem.
However, it should reduce noticeable pulsing caused by normal pump cycling.
Pump Noise Should Become Less Frequent
An accumulator does not physically make the pump motor silent.
Instead, it reduces how frequently the pump needs to activate.
That means you hear the pump less often.
You may also notice less plumbing vibration during small water draws.
What Happens If RV Accumulator Pressure Is Too High?
Too much air pressure reduces how effectively the accumulator stores water.
The bladder already has significant pressure pushing against it. That leaves less usable room for incoming water.
Common symptoms can include:
- Accumulator provides very little stored water.
- Pump starts sooner during small water draws.
- Pump cycling does not improve much.
- Faucet pulsation may remain noticeable.
- Accumulator seems like it is doing very little.
The tank should not be filled simply to the highest allowed pressure.
Its pre-charge needs to work with the pump’s pressure switch.
If performance worsens after increasing pressure, recheck your target setting.
What Happens If RV Accumulator Pressure Is Too Low?
Low pre-charge can also reduce accumulator performance.
Without enough air pressure, the tank cannot provide the intended cushioning effect.
Possible signs include:
- Pump cycling more frequently
- Noticeable water pulsation
- Poor accumulator performance
- Short pump run intervals
- Little improvement during low-flow use
If pressure was previously correct but keeps falling, investigate further.
A leaking valve or damaged internal bladder may be responsible.
Why Does My RV Water Pump Still Cycle After Adjusting the Accumulator?
Correct accumulator pressure should reduce unnecessary cycling. However, several other plumbing problems can cause the pump to keep cycling.
Accumulator Pressure Is Still Incorrect
Check the pre-charge again.
Remember to:
- Turn the pump off.
- Disconnect campground water.
- Open a faucet.
- Remove all water pressure.
Checking the tank while pressurized can lead to incorrect adjustments.
Faucet Flow Is Extremely Low
Very small water demands can sometimes interact poorly with certain pressure switches.
The accumulator should help, but it cannot eliminate every cycling condition.
Try opening the faucet slightly farther.
If cycling suddenly becomes smooth, extremely low flow may be contributing.
There Is a Plumbing Leak
A pump that cycles while every faucet remains closed deserves attention.
Pressure may be escaping somewhere.
Check:
- Faucet connections
- Toilet water valve
- Water heater connections
- Pump fittings
- Outdoor shower
- Low-point drains
- Accessible PEX fittings
Even a slow leak can gradually reduce system pressure.
Once pressure reaches cut-in, the pump starts again.
The Pump Pressure Switch Has a Problem
Your pump’s pressure switch controls when the motor starts and stops.
A worn or incorrectly adjusted switch may cause unusual cycling.
An accumulator cannot fully correct a defective pressure switch.
If accumulator pressure checks correctly, inspect pump operation next.
The Accumulator Bladder Has Failed
Accumulator tanks normally separate air and water using a diaphragm or bladder.
A failed bladder prevents the tank from working correctly.
Press the Schrader valve briefly while the system remains depressurized.
You should normally get air from the air valve.
If water comes through the air valve, the internal bladder has probably failed.
Replacing the accumulator is usually the proper solution.
Can You Adjust the Accumulator While the Water System Is Pressurized?
No. You should not measure the true accumulator pre-charge while water pressure remains in the system.
Pressurized water pushes against the tank’s internal diaphragm.
That pressure influences the reading at the air valve.
You could mistakenly believe the air charge is correct.
Turn the pump off first.
Disconnect city water if connected.
Then open a faucet until water stops flowing under pressure.
Leave that faucet open while taking your measurement.
This gives you a much more accurate pre-charge reading.
Should You Use an Air Compressor on an RV Accumulator Tank?
You can use a regulated air compressor carefully. However, a hand pump is usually easier and safer.
RV accumulator tanks are much smaller than vehicle tires.
A compressor can add several PSI almost instantly.
That makes it easy to overshoot your target.
A simple bicycle pump provides better control.
Add a little air.
Check the gauge.
Then add more if needed.
If you do use a compressor, lower its regulator first.
Use very short bursts and check pressure frequently.
Never exceed the accumulator tank’s rated pressure.
Does Factory Pre-Charge Mean the Tank Is Already Set Correctly?
Not necessarily.
Many accumulator tanks arrive pre-charged from the manufacturer.
That factory setting may not match your RV water pump.
For example, one tank might arrive around 10 PSI. Another model could arrive closer to 20 or 30 PSI.
The factory number gives the tank an initial air charge.
You still need to match it with your particular water system.
That is especially important after installing a new accumulator.
Before using the tank:
- Find your pump’s cut-in pressure.
- Read the accumulator instructions.
- Depressurize your RV water system.
- Check the factory pre-charge.
- Adjust it if needed.
Never assume “pre-charged” means “ready for every RV.”
How Often Should You Check RV Accumulator Tank Pressure?
Accumulator pressure does not need constant adjustment. However, checking it periodically can prevent pump-cycling problems.
A practical schedule is checking it at least once each camping season.
You should also check it:
- After winter storage
- Before a long RV trip
- When pump cycling suddenly increases
- When faucet pulsation returns
- After large seasonal temperature changes
- When diagnosing unusual water-system behavior
Temperature changes can slightly affect air pressure.
A small seasonal difference is not always a problem.
However, repeated major pressure loss should be investigated.
Can an Accumulator Tank Increase RV Water Pressure?
An accumulator does not increase your pump’s maximum pressure capability.
That job belongs to the water pump.
Instead, an accumulator stores water under pressure and smooths delivery.
Its main benefits include:
- Reducing water-flow pulsation
- Reducing frequent pump cycling
- Providing small amounts of stored water
- Smoothing low-flow faucet operation
- Reducing repeated pump noise
This can make water pressure feel more consistent.
But installing an accumulator will not turn a low-pressure pump into a high-pressure pump.
If actual pressure remains weak everywhere, investigate:
- Clogged filters
- Dirty faucet aerators
- Kinked water lines
- Restricted pump strainers
- Weak electrical supply
- Aging water pump
- Incorrect pressure regulator
The accumulator should complement a healthy water system, not replace one.
When Should You Replace the Accumulator Instead of Adjusting It?
Sometimes adding air will not fix the problem.
Replace or closely inspect the accumulator when you notice:
- Water coming from the air valve
- Repeated loss of air pressure
- Cracks in the tank housing
- Visible physical damage
- Failed internal diaphragm
- Severe corrosion on applicable tanks
- No improvement after correct adjustment
Water coming through the Schrader valve is especially concerning.
That usually means water has crossed the bladder separating both chambers.
Once that happens, normal pressure adjustment will not restore proper operation.
Final Words
Setting an RV accumulator tank correctly is not difficult. The important part is using the right pressure reference.
Start by finding your pump’s cut-in pressure. Then check the accumulator manufacturer’s recommendation.
For many systems, that means about 2 to 3 PSI below cut-in. Other tanks may need to match the cut-in setting exactly.
Always check pressure with the pump off and water pressure relieved.
Once adjusted correctly, you should notice smoother water flow and less pump cycling. If those improvements disappear later, check the pre-charge again before replacing other plumbing components.
Related FAQs
Should an RV Accumulator Tank Be 2 or 3 PSI Below Cut-In Pressure?
Many accumulator tanks perform well about 2 to 3 PSI below pump cut-in pressure. However, some manufacturers recommend matching cut-in pressure exactly, so always follow your tank’s specific instructions first.
What Pressure Should an Accumulator Tank Be for a 30 PSI Pump Cut-In?
If your tank uses the common 2-to-3-PSI-below method, set it around 27 to 28 PSI. Check the accumulator instructions because some models may require the full 30 PSI instead.
What Pressure Should an Accumulator Tank Be for a 40 PSI Pump Cut-In?
A typical starting point would be around 37 to 38 PSI when following the 2-to-3-PSI-below method. Confirm that recommendation with your accumulator manufacturer before adjusting it.
Can I Check Accumulator Pressure With the Pump On?
No. Turn the water pump off and remove all water-side pressure before measuring pre-charge. Otherwise, plumbing pressure can affect the reading and lead to an incorrect setting.
Do I Leave a Faucet Open While Checking Accumulator Pressure?
Yes. Leave at least one faucet open after shutting the pump off. This helps keep water-side pressure at zero while you check and adjust the air pre-charge.
Why Does My Accumulator Tank Keep Losing Air?
A small pressure change can happen from temperature changes. Repeated significant losses may indicate a leaking Schrader valve, loose valve core, damaged diaphragm, or another problem inside the accumulator.
Should Water Come Out of the Accumulator Air Valve?
No. Water coming from the air valve usually indicates a failed internal bladder or diaphragm. In most cases, replacing the accumulator tank is the appropriate repair.
Is Cut-In Pressure the Same as Pump PSI?
Not always. A pump’s advertised PSI may represent shutoff or maximum operating pressure. Cut-in pressure is the lower pressure where the pump starts running again.
Do Variable-Speed RV Water Pumps Need an Accumulator Tank?
Not necessarily. Variable-speed pumps already adjust their output to water demand. Some manufacturers also discourage accumulator use with certain smart pumps, so check the pump manual before installing one.
Can Too Much Air Damage an RV Accumulator Tank?
Excessive pre-charge can reduce usable water storage and make the accumulator ineffective. Extremely high pressure could also exceed tank limits, so never go above the manufacturer’s maximum pressure rating.
Can I Use a Regular Tire Pressure Gauge?
Yes. A standard tire gauge can work, although a gauge designed for lower pressures may provide more precise readings around typical RV accumulator settings.
Should I Check Accumulator Pressure Before Winterizing My RV?
It is a good opportunity to inspect the tank, but follow your normal winterization procedure first. You can also recheck the pre-charge before returning the RV to service next season.

Steven Parker writes about everyday RV life, from setup tips to long-term living decisions. His content reflects a calm, experienced approach to RV ownership and travel. He focuses on comfort, reliability, and realistic expectations.