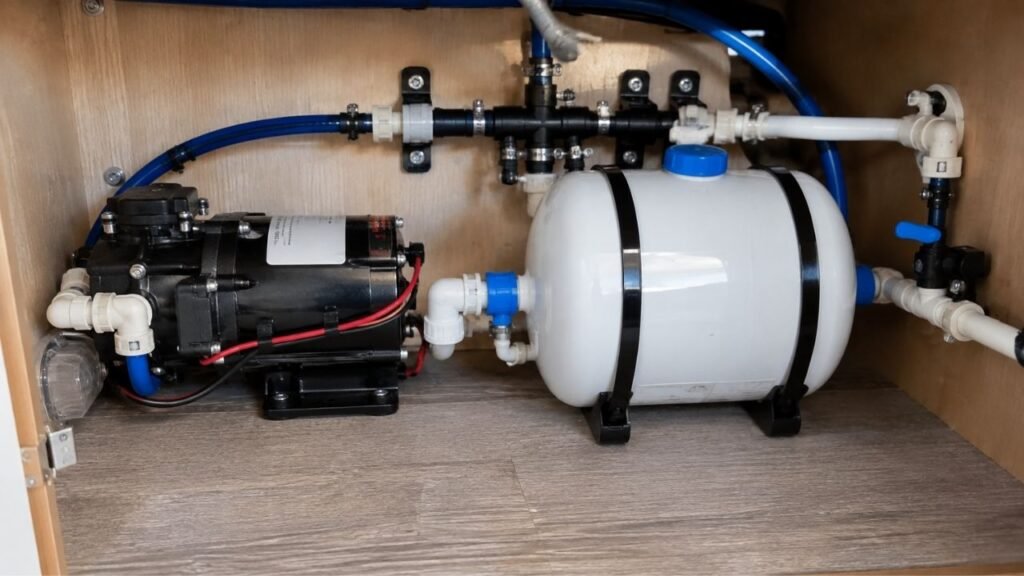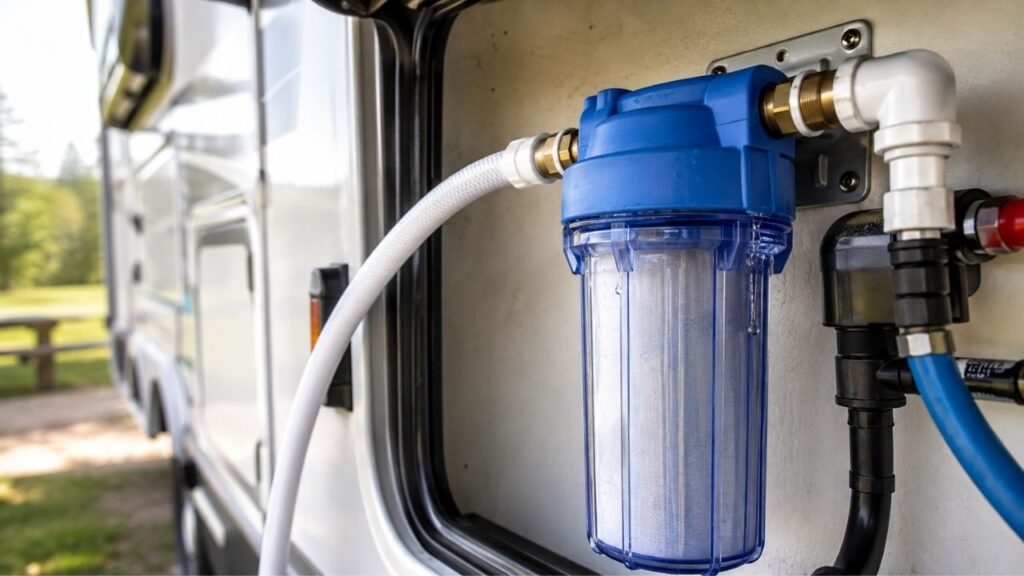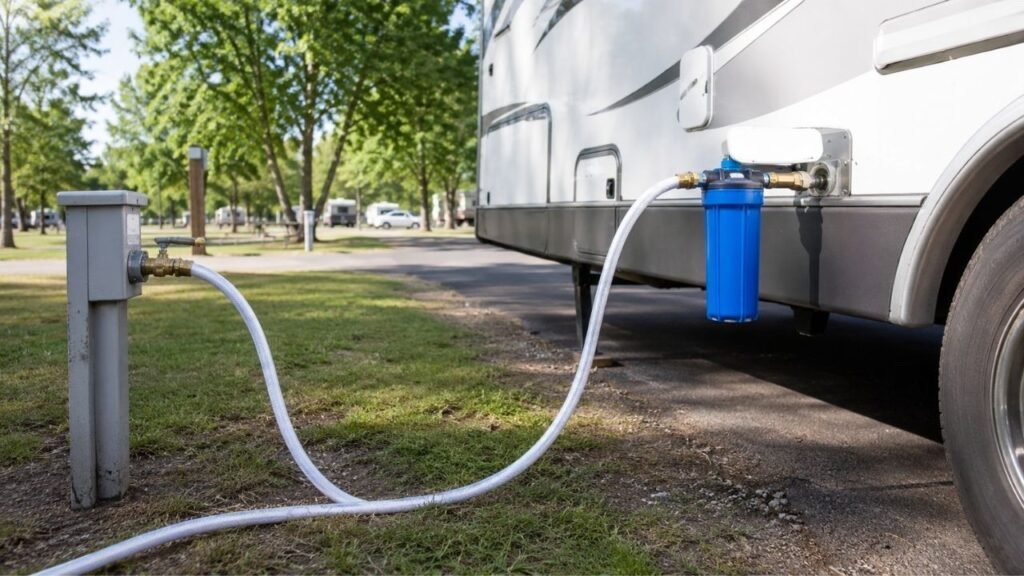
To remove a stuck RV water filter housing, shut off all water sources first. Relieve the plumbing pressure completely, then use the correct housing wrench. Support the filter head and nearby plumbing while applying slow, steady pressure. Avoid excessive force because plastic RV fittings can crack surprisingly easily.
This guide explains why RV filter housings become stuck and how to loosen them safely. I’ll also show you what to avoid, what to inspect afterward, and how to prevent the housing from sticking again.
Key Takeaways
- Shut off city water and the RV water pump first.
- Relieve all pressure before touching the filter housing.
- Confirm how your particular housing unlocks before forcing it.
- Use the proper filter housing wrench whenever possible.
- Support the bracket and nearby plumbing while turning.
- Increase leverage gradually instead of using sudden force.
- Stop if the housing, fittings, or bracket begin flexing.
- Clean and inspect the O-ring before reinstalling everything.
Before You Turn the Housing, Identify What Type You Have
Not every RV water filter housing opens exactly the same way. Identifying the design first can prevent broken tabs, damaged threads, or cracked plumbing.
| RV Filter Housing Type | How You Can Recognize It | Typical Removal Method | Main Risk |
| Standard threaded canister | Bowl screws into a fixed filter head | Relieve pressure and rotate the housing open | Overtightening can make removal difficult |
| Pressure-release housing | Button sits on top of the filter head | Release pressure before using the wrench | Button may not release all trapped pressure |
| Locking-tab housing | Uses tabs or locking teeth instead of normal threads | Unlock according to the housing design | Forcing it like threads can break the tabs |
| Multi-stage filter system | Two or more filter bowls share one bracket | Remove one bowl carefully at a time | Excess torque may twist the shared bracket |
Look closely for molded arrows, labels, or manufacturer markings.
That matters because the apparent turning direction can become confusing. Your viewing angle can make clockwise and counterclockwise instructions misleading.
If the housing does not look conventionally threaded, do not force it.
Why Does an RV Water Filter Housing Get Stuck?
Several problems can make an RV filter canister feel completely seized. Understanding the cause can help you choose the safest removal method.
Water Pressure Is Still Trapped Inside
Residual pressure is one of the most common causes.
The plumbing system may still hold pressure after disconnecting city water. Your RV pump can also maintain pressure inside the lines.
That pressure pushes against the housing and sealing surfaces.
The result can feel exactly like an overtightened filter bowl.
Always depressurize the system before reaching for a larger wrench.
The Housing Was Overtightened
A filter housing usually needs much less tightening than people expect.
Many RV owners use the plastic housing wrench during installation. That can create far more tightening force than necessary.
The housing then becomes extremely difficult to remove later.
The wrench is generally more useful for loosening than tightening.
The O-Ring Is Dry or Pinched
The O-ring creates the watertight seal between both housing pieces.
If it becomes dry, twisted, dirty, or pinched, friction increases considerably.
A neglected O-ring may also stick against the sealing surface.
That can make the housing feel glued together.
Scale or Sediment Has Built Up
Hard water can leave mineral deposits around the housing joint.
Sand, dirt, and sediment can also collect near the threads.
These deposits increase resistance when you try opening the housing.
Campground water quality varies considerably across the United States.
That makes mineral buildup especially common for frequently traveling RV owners.
The Housing Has Not Been Opened Recently
A filter housing can become harder to remove over time.
The O-ring remains compressed while moisture and minerals accumulate around it.
Long filter-change intervals can therefore make the next removal difficult.
Freezing Has Damaged the Housing
Freezing temperatures deserve extra attention with RV plumbing.
Water expands when frozen inside a filter bowl.
That expansion can distort the housing or create tiny cracks.
A freeze-damaged canister should not simply receive more leverage.
Inspect it carefully before trying aggressive removal methods.
What Tools Do You Need to Remove a Stuck RV Water Filter Housing?
You usually need only a few basic tools for this job. Having everything nearby also keeps the process controlled and less frustrating.
- Correctly sized filter housing wrench
- Non-marring strap wrench
- Shallow drain pan
- Absorbent towels
- Flashlight
- Rubber mallet
- Work gloves
- Replacement O-ring
- Approved O-ring lubricant
- Small cleaning cloth
- Second person for support when needed
Avoid assuming that a bigger tool automatically works better.
Large metal tools can crush plastic housings instead of loosening them.
How Do You Remove a Stuck RV Water Filter Housing?
The safest approach is to increase force gradually. Start by removing every possible source of plumbing pressure.
1. Turn Off the City Water Supply
Disconnect your RV from the campground water connection.
If you use an inline shutoff valve, close that completely.
Do not depend only on the campground spigot being partially closed.
You want the RV completely separated from external water pressure.
2. Turn Off the RV Water Pump
Switch off your 12-volt water pump before continuing.
Otherwise, the pump may repressurize the plumbing while you work.
I also like checking that nobody accidentally switches it back on.
3. Relieve the Remaining Plumbing Pressure
Open a nearby faucet after shutting off both water sources.
Let the water run until the flow completely stops.
You can also open the appropriate low-point drain when necessary.
If your housing has a pressure-release button, press it carefully.
You may hear air escaping or see a little water release.
Do not assume the system is depressurized just because water slowed down.
Wait until the pressure is clearly gone.
4. Place Towels or a Drain Pan Underneath
A filter housing can still contain a surprising amount of water.
Place towels or a shallow pan directly underneath it.
This matters even more inside enclosed RV wet bays.
Nearby electrical connections, wood panels, and stored equipment dislike water.
Preparing for spills makes the entire job much easier.
5. Confirm the Correct Opening Direction
Look for molded arrows around the filter head or housing.
Some housings also display OPEN and CLOSE markings.
Use those markings instead of relying solely on general directions.
Standard threaded filter bowls commonly loosen in the expected direction.
However, your viewing position can make that direction confusing.
Older or specialized RV housings may also use locking tabs instead.
Never force an unfamiliar housing until you understand its release method.
6. Position the Filter Wrench Properly
Slide the housing wrench fully around the filter bowl.
I prefer positioning it closer to the upper section when possible.
That reduces the twisting force placed on the lower canister.
Make sure the wrench engages evenly before applying pressure.
A partially seated wrench can slip and damage the housing.
7. Support the Filter Head and Bracket
This is one of the most important steps.
Hold the filter head or mounting area with your free hand.
Watch the nearby:
- PEX tubing
- Plastic elbows
- Threaded adapters
- Mounting screws
- Filter bracket
- Shutoff valves
You want the filter bowl turning without everything else twisting.
If the plumbing starts moving, stop applying force.
8. Apply Slow and Steady Pressure
Pull the housing wrench using smooth, controlled pressure.
Do not jerk the handle suddenly.
Steady pressure gives the housing time to release gradually.
A sudden impact can transfer force directly into plastic fittings.
If it starts moving, continue slowly until it turns freely.
Keep the drain pan underneath while removing the bowl.
What Should You Try If the Filter Housing Still Will Not Move?
A stubborn filter does not automatically require extreme force. Try these methods gradually while watching the surrounding plumbing carefully.
Try a Tiny Movement in Both Directions
Sometimes static friction needs to be broken first.
Move the housing very slightly toward the seated direction.
Then try loosening it again.
I mean a tiny movement here.
You are not trying to tighten the housing further.
This slight movement can sometimes break the seal around the O-ring.
Gently Tap Around the Housing Joint
A rubber mallet can help loosen mineral deposits.
Tap gently around the upper edge where the housing meets the head.
The goal is vibration, not impact.
Do not hammer directly against thin plastic sections.
Several light taps work better than one hard strike.
Try the housing wrench again after tapping.
Use Two Proper Housing Wrenches
Some stubborn housings respond better to distributed force.
If you have two matching housing wrenches, position them carefully.
This spreads the turning force across more of the canister.
However, both wrenches must fit the housing properly.
Improvised leverage can create uneven stress and crack the bowl.
Try a Non-Marring Strap Wrench
A strap wrench can provide additional grip without metal teeth.
Place the strap near the stronger upper section of the housing.
Tighten it only enough to create useful friction.
Watch the canister while pulling.
Stop immediately if the plastic begins visibly deforming.
Use Gentle Warmth Only as a Last Resort
Mild warmth may sometimes help stubborn plastic components release.
A warm towel around the joint is the safer approach.
Avoid excessive heat around plastic filter housings.
Never use:
- Open flames
- Propane torches
- Very hot heat guns
- Boiling water
- Direct high-temperature heating
Too much heat can weaken or permanently deform the housing.
If your manufacturer warns against heat, skip this method entirely.
When Should You Stop Trying to Force the Housing?
Knowing when to stop can save an expensive plumbing repair. Excessive force can quickly turn a filter change into water damage.
Stop immediately if you notice:
- The filter head rotates with the bowl.
- The mounting bracket starts bending.
- PEX lines begin twisting.
- Plastic elbows start moving.
- The housing develops white stress marks.
- Cracks appear anywhere on the bowl.
- The wrench repeatedly slips.
- Locking tabs begin breaking.
- Mounting screws start pulling loose.
- The entire assembly moves noticeably.
- You suspect previous freeze damage.
- You cannot determine the correct unlocking method.
Replacing one filter housing is usually straightforward.
Repairing broken plumbing inside an RV can become much more complicated.
What Tools Should You Avoid on a Plastic RV Filter Housing?
Certain tools can create more damage than useful leverage. Plastic filter bowls need controlled rotational force instead of crushing pressure.
Avoid using:
- Pipe wrenches
- Large locking pliers
- Channel-lock pliers directly on the bowl
- Screwdrivers as pry bars
- Long cheater pipes
- Metal hammers
- Propane torches
- High-temperature heat guns
The key difference is how the tool applies force.
A proper housing wrench spreads rotational force around the canister.
Metal jaws concentrate pressure into small areas.
That concentrated pressure can crack plastic before the threads move.
What Should You Check Once the Filter Housing Comes Off?
Do not immediately install a new filter and close everything again. Take a few minutes to inspect the components causing the problem.
Inspect the Housing for Cracks
Wash or wipe the empty housing first.
Then inspect the entire surface under good lighting.
Pay special attention to:
- Threaded areas
- Upper rim
- Bottom corners
- Pressure-release area
- Mold seams
Look for cracks, distortion, or white stress marks.
Replace questionable housings rather than taking unnecessary chances.
Inspect the O-Ring
Remove the O-ring carefully from its groove.
Look for:
- Cracks
- Flattened areas
- Cuts
- Hard spots
- Swelling
- Stretching
- Twisting
- Embedded dirt
A damaged seal should be replaced.
Do not expect additional tightening to compensate for a failing O-ring.
Clean the O-Ring Groove
Dirt can hide inside the groove beneath the O-ring.
Wipe that area clean using a soft cloth.
Remove scale or grit without scratching the sealing surface.
A clean groove helps the O-ring sit evenly.
Clean the Housing Threads and Sealing Surfaces
Inspect the threads for mineral deposits and trapped sediment.
Clean them gently before reinstalling the housing.
Avoid sharp tools that can gouge plastic threads.
Damaged threads may cause both sticking and leaking later.
Lubricate the O-Ring Correctly
Use only lubricant suitable for your housing and O-ring material.
A very thin coating is normally enough.
The lubricant helps the O-ring seat properly without twisting.
More lubricant does not create a better seal.
Excess material can attract dirt and make future servicing messier.
How Tight Should an RV Water Filter Housing Be After Reassembly?
An RV water filter housing generally should not be extremely tight. Install the O-ring properly, start the housing squarely, and tighten according to the manufacturer’s instructions.
For many common canister systems, hand-tightening is enough. The O-ring creates the seal, not extreme thread pressure.
Avoid automatically grabbing the housing wrench during installation.
Using the wrench to tighten can recreate the exact problem you just fixed.
Once the housing feels seated properly, stop tightening.
If it leaks after repressurizing, shut the water down again.
Inspect the O-ring instead of simply applying more force.
A twisted or damaged seal is often the real problem.
How Do You Pressure-Test the RV Water Filter After Reinstalling It?
Repressurize the system slowly after everything is assembled. This gives you time to catch a small leak before it becomes serious.
- Close any faucets and drains you previously opened.
- Restore the water supply gradually.
- Turn on the RV water pump when tank testing.
- Open a faucet briefly to release trapped air.
- Check around the filter housing joint.
- Inspect the inlet and outlet connections.
- Dry the entire area with a clean towel.
- Wait several minutes and inspect everything again.
Running your fingers around the joint can reveal tiny leaks.
A dry paper towel also makes slow moisture easier to notice.
If water appears, shut the system down again.
Do not solve every leak by tightening the housing harder.
How Can You Keep an RV Water Filter Housing From Getting Stuck Again?
Most stuck-filter problems are easier to prevent than repair. A few habits during every filter change can make future servicing much easier.
- Hand-tighten the housing whenever the manufacturer allows it.
- Keep the O-ring clean and properly seated.
- Replace cracked or flattened O-rings.
- Use only suitable O-ring lubricant.
- Keep housing threads free from dirt.
- Change filters at appropriate intervals.
- Depressurize the system before every filter change.
- Never leave water inside during freezing conditions.
- Inspect the mounting bracket periodically.
- Watch nearby plumbing while servicing the filter.
- Keep the correct filter wrench inside your RV.
One habit makes an especially large difference.
Do not tighten the housing harder just because you fear leaks.
A properly seated O-ring provides the seal.
Should You Replace a Stuck RV Water Filter Housing Instead?
Sometimes replacement makes more sense than continuing the struggle.
Replace the housing if you see cracks, severe distortion, or freeze damage. Damaged threads and broken locking tabs also justify replacement.
I would also consider replacement if the housing repeatedly becomes stuck.
That may indicate worn threads, an aging seal surface, or damaged components.
A housing that leaks despite a new correctly installed O-ring also deserves attention.
Inspect the filter head at the same time.
Sometimes the problem sits above the bowl instead of inside it.
Check the bracket and nearby fittings before installing new components.
Final Words
Removing a stuck RV water filter housing is mostly about preparation. Completely relieving pressure often makes a difficult housing much easier to loosen.
Use controlled force rather than brute strength. Support the filter assembly and watch the nearby plumbing throughout the process.
If plastic begins bending, twisting, cracking, or whitening, stop.
Replacing a damaged housing is far cheaper than repairing flooded RV plumbing.
Related FAQs
Which Way Do You Turn an RV Water Filter Housing to Remove It?
Most threaded filter bowls loosen in the normal unscrewing direction, but your viewing angle can make that confusing. Check molded OPEN arrows or manufacturer instructions before forcing anything. Some older housings also use locking tabs instead of standard threads.
Why Won’t My RV Water Filter Housing Unscrew?
The housing may still contain water pressure, or it could be overtightened. A dry O-ring, mineral buildup, sediment, damaged threads, or an unfamiliar locking mechanism can also prevent normal removal.
Can I Use a Strap Wrench on an RV Water Filter Housing?
Yes, a non-marring strap wrench can provide additional grip on stubborn housings. Position it carefully and stop if the plastic begins deforming. Avoid metal-jawed tools that concentrate pressure on one area.
What If My RV Filter Housing Has No Pressure-Release Button?
Turn off city water and your RV water pump completely. Then open a nearby faucet or appropriate low-point drain until water stops flowing and all remaining pressure has escaped.
Can I Use a Hair Dryer on a Stuck Water Filter Housing?
Gentle warmth may help in some situations, but use extreme caution. A warm towel is safer than concentrated heat. Never use flames or excessive temperatures that could weaken the plastic housing.
Should I Lubricate an RV Water Filter Housing O-Ring?
Lubricate the O-ring when your housing manufacturer recommends doing so. Use only a lubricant compatible with the specific seal material, and apply a very thin coating before reassembly.
Should I Use the Filter Wrench to Tighten the Housing?
Usually, you should avoid wrench-tightening unless your manufacturer specifically requires it. Many filter housings need only proper O-ring seating and hand-tightening. Excessive wrench pressure often causes future removal problems.
Can Freezing Make an RV Water Filter Housing Difficult to Remove?
Yes. Water freezing inside the housing can distort the plastic or create cracks. If you suspect freeze damage, inspect the housing carefully before applying additional force and replace damaged components.

Steven Parker writes about everyday RV life, from setup tips to long-term living decisions. His content reflects a calm, experienced approach to RV ownership and travel. He focuses on comfort, reliability, and realistic expectations.