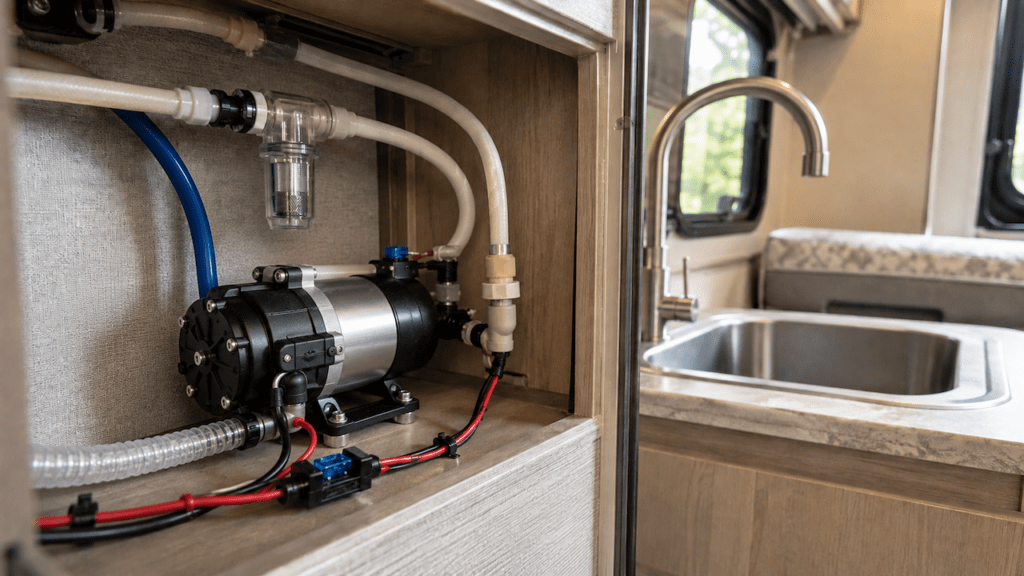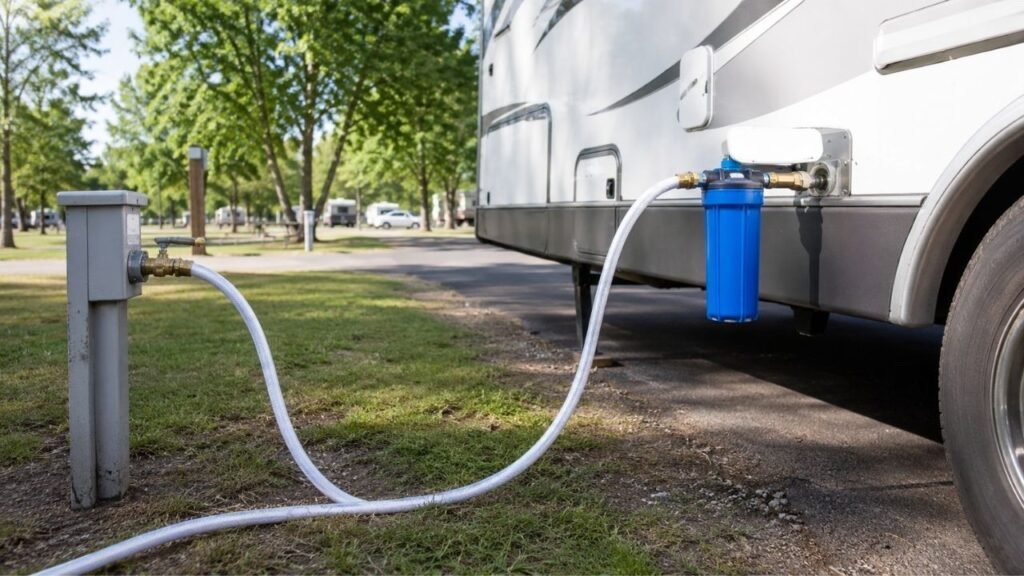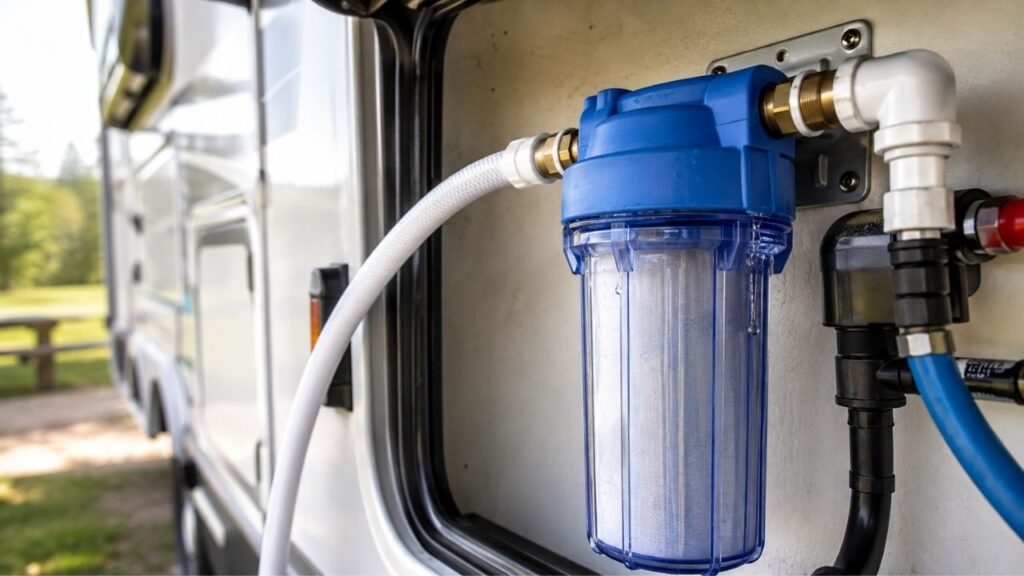
Your RV water filter housing usually leaks because the O-ring is dirty, damaged, twisted, or incorrectly seated. Other common causes include loose fittings, cross-threaded housing threads, a leaking pressure-relief button, excessive water pressure, or a canister cracked by freezing.
The good news is that many filter housing leaks are fairly easy to diagnose. I’ll help you find exactly where the water is escaping, identify the likely cause, fix it safely, and know when replacing the housing is the better choice.
Key Takeaways
- A leak around the housing seam usually points to the O-ring.
- Always shut off the water and release pressure before opening the housing.
- Water dripping down the canister may actually start from a fitting above it.
- A loose housing can leak, but overtightening can also damage the seal.
- Cracked or freeze-damaged filter housings should generally be replaced.
- High campground water pressure can expose weak seals and fittings.
- A leaking pressure-relief button may simply have sediment trapped underneath it.
- Restore water pressure slowly after every repair and check for fresh leaks.
First, Find Exactly Where the RV Water Filter Is Leaking
Before taking anything apart, figure out where the water first becomes visible. This makes troubleshooting much easier because water can travel down the outside of the canister and drip from a completely different spot.
Dry the entire filter housing, filter head, fittings, and surrounding plumbing with a towel. Then slowly restore pressure and watch closely for the first wet area.
| Where the Leak Starts | Most Likely Cause | What to Check First | Typical Solution |
| Between housing and filter head | O-ring problem | O-ring and sealing groove | Clean, reseat, lubricate, or replace |
| Pressure-relief button | Dirt or damaged button seal | Relief button | Flush debris or replace faulty part |
| Inlet connection | Loose or poorly sealed fitting | Threads, washer, fitting | Reseat or reseal connection |
| Outlet connection | Loose fitting or damaged seal | Fitting and threads | Tighten or replace damaged seal |
| Side of plastic housing | Crack or freeze damage | Entire canister | Replace housing |
| Around housing threads | Cross-threading or damaged threads | Thread alignment | Reinstall or replace housing |
| Bottom of canister | Crack or water running downward | Housing above the drip | Trace water to its actual starting point |
Taking a minute to locate the source can save you from replacing parts that are perfectly fine.
Shut Off and Depressurize the RV Water System Before Repairing It
A filter housing is under water pressure during normal operation. Releasing that pressure first protects the housing, prevents a sudden spray of water, and makes the canister much easier to remove.
- Shut off the campground or city water connection.
- Turn off your RV’s 12-volt water pump.
- Open a nearby cold-water faucet.
- Let the water run until pressure drops.
- Use the filter’s pressure-relief button if your model has one.
- Place towels or a small container below indoor housings.
- Never try to unscrew a pressurized filter canister.
Once the pressure is gone, you can safely inspect the housing.
Why Is My RV Water Filter Housing Leaking?
Several different problems can create what looks like the same leak. The location and timing of the drip usually tell you which component deserves attention first.
The O-Ring Is Dirty, Twisted, Dry, or Damaged
If water is escaping from the seam between the filter bowl and the filter head, I would check the O-ring first.
The O-ring creates the seal between those two parts. Even a small amount of sand, grit, old lubricant, or sediment beneath it can prevent the rubber from sitting flat.
The O-ring can also become stretched when the housing is removed. It may twist inside its groove during installation or flatten after repeated filter changes.
Remove the O-ring and inspect it carefully. Look for cracks, cuts, hard spots, swelling, flattening, or permanent stretching.
Clean the O-ring groove before putting everything back together. A perfectly good seal can still leak if dirt remains underneath it.
If the O-ring looks damaged or no longer fits naturally into its groove, replace it with the correct size for your housing.
The Filter Housing Is Cross-Threaded
Cross-threading is especially easy to do when an RV water filter is installed in a cramped compartment.
The canister should normally screw into the filter head smoothly. If it suddenly becomes difficult to turn while there is still a large gap, stop.
Forcing the housing can damage the plastic threads and leave the canister sitting at a slight angle. That uneven alignment prevents the O-ring from making consistent contact.
Unscrew the housing completely and inspect the threads.
Start it again slowly while keeping the canister straight. If the threads repeatedly bind or appear visibly damaged, replacing the affected housing component may be necessary.
The Housing Was Tightened Incorrectly
It is easy to assume that a leaking water filter simply needs to be tightened harder.
Sometimes a housing really is too loose. However, overtightening creates another set of problems.
Too much force can pinch the O-ring, distort plastic threads, damage the sealing surface, or eventually crack the filter housing.
Tightening requirements are not identical for every filter system. Some manufacturers recommend hand tightening, while others allow limited use of a housing wrench.
Follow the instructions for your specific housing rather than applying as much force as possible.
A filter wrench is mainly intended to help remove a stubborn housing. It should not automatically be treated as a tool for maximum tightening.
The Filter Canister Cracked From Freezing
Freeze damage is one of the more serious reasons an RV water filter housing starts leaking.
Water expands when it freezes. If water remains trapped inside the filter canister during freezing weather, that expansion can put tremendous stress on the plastic.
The resulting crack may be obvious, but it can also be extremely small.
You might only notice a thin wet line forming after the water system becomes pressurized.
Check carefully around the bottom of the canister, threaded areas, molded corners, and connections.
If you find a structural crack, replace the housing. I would not rely on glue, tape, or epoxy for a permanent repair on a pressure-bearing water filter canister.
The Inlet or Outlet Fitting Is Leaking
Sometimes the filter housing itself is perfectly fine.
The actual leak may be coming from the inlet or outlet fitting attached to the filter head.
RV plumbing experiences vibration every time you travel. Over time, fittings can loosen slightly.
Depending on your system, you might have threaded connections, hose fittings, flexible tubing, or quick-connect plumbing.
Dry the filter head completely and watch each connection while pressure is restored.
If one fitting becomes wet before the housing does, you have probably found the real problem.
Inspect the fitting for damaged threads, worn washers, loose tubing, or an improperly seated connection before tightening anything.
The Pressure-Relief Button Is Leaking
Many canister-style water filter housings have a small pressure-relief button on top.
Sediment, sand, or tiny particles can sometimes become trapped beneath the valve.
That debris may prevent the valve from closing completely, allowing a slow drip to form around the button.
With the water pressure safely controlled, operating the button several times may help flush the debris away.
If the button continues leaking, its internal seal or valve may be worn.
Depending on the filter design, you may be able to replace the valve assembly. On other systems, replacing the filter head is the more practical solution.
Campground Water Pressure Is Too High
Campground water pressure can vary considerably from one location to another.
Your filter might seem perfectly fine at one campground and start dripping immediately after connecting somewhere else.
That does not always mean the campground pressure created the original damage. Higher pressure may simply expose an O-ring, fitting, or housing that was already beginning to fail.
Use a drinking-water-safe pressure regulator when connecting your RV to campground water.
The correct pressure depends on your RV and plumbing system, so follow the manufacturer’s recommendations rather than assuming the filter housing’s maximum rating is safe for everything downstream.
The Filter Cartridge Is Not Seated Correctly
If your housing started leaking immediately after changing the filter, inspect the cartridge installation.
A cartridge sitting crooked can interfere with the housing as you tighten it.
The same problem can happen when the replacement cartridge is slightly different from the original filter or isn’t centered correctly inside the canister.
Remove the housing and make sure the filter sits straight on its guides.
Also check that no packaging material, protective cap, or old filter component was accidentally left inside.
Once the cartridge is centered correctly, reinstall the housing carefully.
The Housing or Filter Head Is Old or Damaged
Plastic filter components do not last forever.
Heat, sunlight, vibration, repeated filter changes, freezing conditions, and normal aging can eventually weaken them.
Inspect older housings for:
- Brittle plastic
- White stress marks
- Damaged threads
- Warped sealing surfaces
- Cracked filter heads
- Damaged O-ring grooves
- Loose mounting points
- Discoloration around stressed areas
If you repeatedly install a good O-ring correctly and the same leak returns, the housing itself deserves closer inspection.
How to Fix a Leaking RV Water Filter Housing Step by Step
The easiest way to repair the leak is to work methodically instead of tightening random parts. Start with pressure removal, identify the actual source, and only repair the component responsible.
- Turn off the water supply. Disconnect or shut off campground water and switch off the RV water pump.
- Release plumbing pressure. Open a faucet until water stops flowing under pressure.
- Dry the filter assembly. Wipe the housing, filter head, fittings, and nearby tubing completely dry.
- Identify the first wet point. Briefly restore pressure if necessary and watch where water first appears.
- Remove the housing if the seam leaks. Depressurize the system again before unscrewing the canister.
- Inspect the O-ring and sealing groove. Look for dirt, twisting, cracks, flattening, or stretching.
- Inspect the housing and threads. Check for cross-threading, cracks, distortion, and damaged sealing surfaces.
- Check the cartridge position. Make sure the filter is centered and correctly seated.
- Repair or replace the damaged component. Replace a worn O-ring, reseal the correct fitting, or replace cracked housing parts.
- Reassemble carefully. Keep the housing straight and follow the manufacturer’s tightening instructions.
- Restore water pressure slowly. Avoid hitting the freshly assembled housing with full pressure immediately.
- Watch for several minutes. Inspect the seam, button, inlet, outlet, and bottom of the housing before assuming the repair is complete.
I also like to check the area again later. A very slow leak may take several minutes to show itself.
How to Clean and Reseat the Filter Housing O-Ring
Because the O-ring causes so many housing leaks, giving it a proper inspection is usually worth the extra few minutes.
- Remove the O-ring without cutting or stretching it unnecessarily.
- Wipe sediment from the rubber using a clean cloth.
- Clean the entire O-ring groove.
- Inspect the ring for cracks, flattening, swelling, or hard areas.
- Replace an O-ring that no longer fits correctly.
- Apply a very thin film of approved silicone lubricant if recommended.
- Place the O-ring flat inside its groove.
- Make sure it is not twisted.
- Inspect the sealing surface above the O-ring.
- Reinstall the filter housing straight.
You do not need a large amount of lubricant. The goal is simply to help the seal stay seated and avoid binding during assembly.
Should You Use Silicone Grease, Vaseline, or Thread Tape?
Silicone grease is commonly used on water-filter O-rings because an appropriate food-grade or potable-water-compatible product can help the rubber stay seated and move without twisting. Use the lubricant recommended for your particular housing and O-ring material.
I would avoid assuming that ordinary Vaseline or another petroleum jelly is automatically safe for every filter seal. Different O-ring materials react differently to lubricants. Unless your housing manufacturer specifically approves it, use a compatible silicone-based product intended for potable-water seals.
PTFE tape, often called Teflon tape, serves a different purpose. It may be used on certain tapered threaded plumbing connections where the manufacturer calls for thread sealant.
Do not wrap PTFE tape around the large filter canister threads hoping it will replace the O-ring. On most canister housings, the O-ring makes the actual watertight seal.
Why Does My RV Water Filter Housing Leak Only at Certain Times?
When a leak appears only under specific conditions, that timing becomes an important diagnostic clue. Pay attention to whether it happens after maintenance, on campground water, while using the pump, or following cold-weather storage.
It Leaks Right After I Change the Filter
A leak that begins immediately after a filter replacement usually points to something disturbed during reassembly.
The O-ring may have moved out of its groove, picked up dirt, stretched, or become twisted.
You may also have installed the cartridge slightly crooked or started the filter canister at an angle.
Depressurize the system, remove the housing, and inspect your work before tightening it harder.
It Leaks Only When Connected to City Water
If the filter stays dry while using your onboard pump but leaks on campground water, pressure deserves attention.
City water may be entering the RV at a higher pressure than your onboard pump normally produces.
Check your pressure regulator and inspect the leaking component carefully. Higher pressure often reveals marginal O-rings, loose fittings, or small cracks.
It Leaks Only When the RV Water Pump Runs
A leak appearing when the pump runs simply tells you the problem occurs when the plumbing becomes pressurized.
Do not automatically assume the pump itself is bad.
Dry the area around the pump, filter, fittings, and nearby tubing.
Turn the pump on and watch for the first connection that becomes wet.
Remember that water traveling along a hose or mounting surface can make the leak appear farther away from its real source.
It Started Leaking After Winter Storage
A filter housing that suddenly leaks after winter deserves a careful crack inspection.
Even if you winterized most of the RV, a small amount of water left inside the filter canister may have frozen.
Remove the housing and inspect it under bright light.
Pay particular attention to the base, threads, molded corners, inlet and outlet areas, and filter head.
If the housing has freeze damage, replacement is the safest solution.
How Can I Tell Whether the Housing Is Cracked?
A large crack is easy to find, but many damaged filter housings develop tiny fractures that only leak under pressure.
Dry everything completely before inspecting it.
Look for:
- Thin white stress lines in the plastic
- Hairline cracks near the threads
- Cracks around inlet or outlet areas
- A wet line appearing on the side of the canister
- Distorted or bulging plastic
- Cracks near molded seams
- A recurring leak despite installing a new O-ring correctly
A flashlight can help you inspect translucent filter housings.
You can also place a dry paper towel against suspicious areas while slowly pressurizing the system. A small amount of moisture will show on the towel quickly.
Can You Repair a Cracked RV Water Filter Housing?
I recommend replacing a cracked RV water filter housing rather than trying to permanently patch it.
Remember that the housing must hold pressurized water. A repair made with epoxy, tape, glue, or sealant may temporarily stop visible dripping without restoring the original strength of the plastic.
Temperature changes and water pressure can eventually reopen the crack.
That becomes especially risky when the filter is mounted inside an RV cabinet, basement compartment, or another area where unnoticed leaking could damage flooring, insulation, or cabinetry.
Replacing the damaged pressure-bearing component provides a much more dependable repair.
When Should You Replace the Entire RV Water Filter Housing?
Not every leak requires a new housing. A dirty O-ring or loose fitting may cost very little to correct. Structural damage, however, is different.
Consider replacing the housing when you find:
- A crack anywhere in the filter bowl
- Freeze damage
- Severely damaged threads
- A distorted sealing surface
- A damaged O-ring groove
- Brittle or deteriorated plastic
- A cracked filter head
- A broken pressure-relief assembly that cannot be serviced
- Repeated leaks despite using the correct new O-ring
- Damage caused by an unsupported or stressed mounting position
When replacing the housing, make sure the new unit is compatible with your RV plumbing, cartridge size, flow needs, temperature conditions, and intended potable-water use.
How to Prevent Your RV Water Filter Housing From Leaking Again
A little routine care can prevent most recurring leaks. The biggest goals are protecting the seal, controlling water pressure, and keeping water from freezing inside the filter.
- Inspect the O-ring whenever you change the cartridge.
- Keep the O-ring groove clean.
- Carry a spare O-ring that fits your exact housing.
- Never force plastic housing threads.
- Follow the manufacturer’s tightening instructions.
- Secure exterior filter systems so they do not bounce during travel.
- Check plumbing fittings after rough roads or long trips.
- Use an appropriate water-pressure regulator with campground hookups.
- Restore pressure slowly after filter maintenance.
- Drain the filter system before freezing temperatures.
- Remove cartridges when your winterization procedure requires it.
- Never leave a water-filled filter housing exposed to freezing weather.
- Protect exterior plastic housings from unnecessary sunlight and impact.
- Inspect the filter assembly periodically for slow drips and water stains.
Catching a tiny leak early is much easier than dealing with water damage inside the RV.
Common Mistakes That Make an RV Filter Housing Leak Worse
Some attempts to stop a small drip can actually create a larger problem.
- Tightening the canister harder every time it leaks
- Opening the housing before releasing water pressure
- Reusing a cracked or flattened O-ring
- Installing the O-ring while it is twisted
- Leaving sand or sediment in the O-ring groove
- Cross-threading the filter canister
- Using excessive force with a housing wrench
- Putting thread tape where the housing O-ring should seal
- Ignoring excessive campground water pressure
- Trying to permanently patch a cracked housing with glue
- Leaving water inside the filter during freezing weather
- Assuming the lowest dripping point is the actual source
If a repair doesn’t work, return to the beginning and locate the first wet point instead of adding more tightening force.
Final Words
When your RV water filter housing starts leaking, begin by identifying exactly where the water originates. A seam leak usually sends you toward the O-ring, while a top leak may point toward the relief button or plumbing fittings. Cracks, high pressure, cross-threading, and freeze damage should also remain on your checklist.
Most small seal problems are inexpensive to correct. Structural damage deserves more caution. If the filter bowl, filter head, or threads are cracked or badly damaged, replacing the affected housing is usually safer than repeatedly trying to seal it.
Related FAQs
Why Is My RV Water Filter Housing Leaking After Changing the Filter?
A leak immediately after changing the filter usually means the O-ring moved, twisted, picked up debris, or failed to seat correctly. The cartridge may also be crooked or the canister may have started cross-threaded. Shut off the water, depressurize the system, remove the housing, and carefully inspect the installation.
Why Does My Water Filter Housing Leak Around the O-Ring?
Water leaking around the O-ring usually indicates dirt in the sealing groove, a twisted seal, incorrect installation, or an O-ring that has become cracked, flattened, or stretched. Clean the groove, inspect the seal, apply an approved lubricant if required, and replace the O-ring when damaged.
How Tight Should an RV Water Filter Housing Be?
The correct tightness depends on the filter housing design, so follow the manufacturer’s instructions for your specific model. Avoid automatically forcing a plastic housing tighter with a wrench because excessive force can distort the O-ring, damage threads, or crack the canister.
Can High Campground Water Pressure Cause a Filter Housing to Leak?
Yes. Higher campground water pressure can expose weak O-rings, fittings, cracked plastic, or damaged threads that did not leak under lower pressure. Use a suitable RV water-pressure regulator and keep the pressure within the limits recommended for your RV’s plumbing system.
Why Is the Red Pressure-Relief Button on My Water Filter Leaking?
A pressure-relief button can drip when sand, sediment, or other debris becomes trapped beneath its internal seal. Operating the button after safely controlling water pressure may clear the debris. If leaking continues, the valve or its seal may be damaged and require replacement.
Can I Use Silicone Grease on an RV Water Filter O-Ring?
You can use a thin coating of compatible food-grade or potable-water-safe silicone lubricant when your filter manufacturer recommends it. The lubricant helps the O-ring stay seated and reduces twisting, but using too much is unnecessary.
Should I Put Teflon Tape on My Water Filter Housing?
Do not normally put PTFE or Teflon tape on the large canister threads when an O-ring provides the housing seal. Thread tape may be appropriate on certain tapered inlet or outlet fittings, but it should only be used where the filter or fitting manufacturer recommends it.
Can a Water Filter Cartridge Cause the Housing to Leak?
Yes. A cartridge that is crooked, incorrectly sized, improperly centered, or installed with leftover packaging can interfere with the housing and prevent it from closing evenly. Remove the canister, verify that the cartridge fits properly, and reinstall everything carefully.
Can I Repair a Cracked RV Water Filter Housing?
A cracked pressure-bearing RV filter housing should generally be replaced rather than permanently patched. Adhesives, tape, or epoxy may temporarily reduce dripping but cannot reliably restore the original structural strength of the housing under changing water pressure.
How Do I Keep My RV Water Filter Housing From Freezing?
Drain the filter housing completely before freezing temperatures and follow your RV and filter manufacturer’s winterization instructions. Remove the cartridge when required, drain trapped water, and make sure exposed filter housings are protected instead of leaving water inside them where it can freeze and expand.

Steven Parker writes about everyday RV life, from setup tips to long-term living decisions. His content reflects a calm, experienced approach to RV ownership and travel. He focuses on comfort, reliability, and realistic expectations.