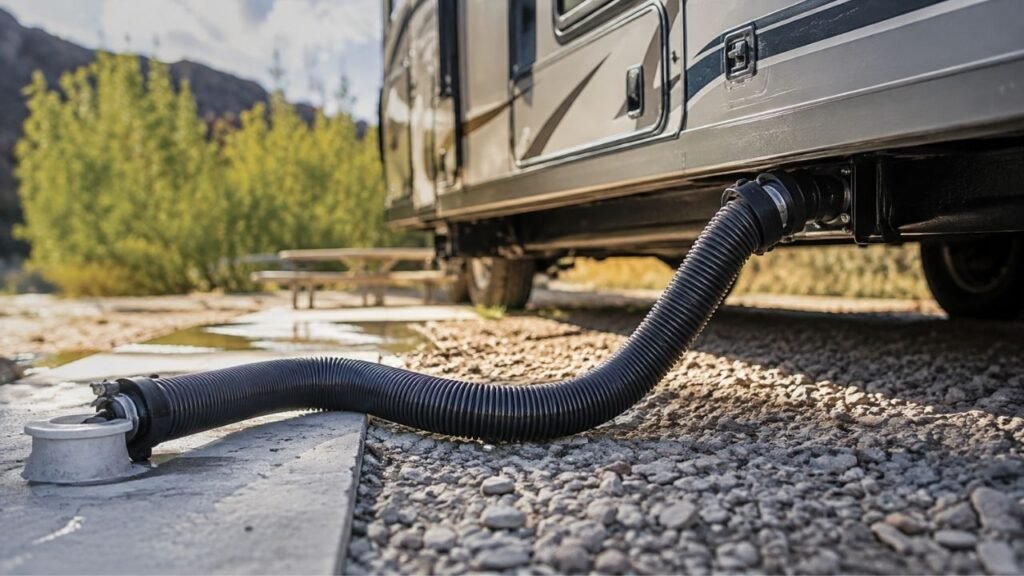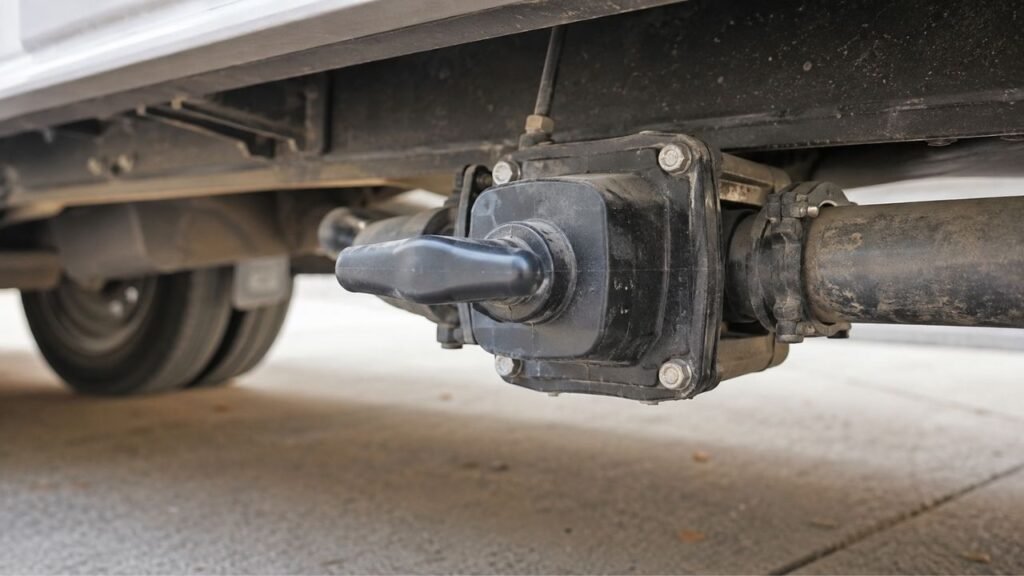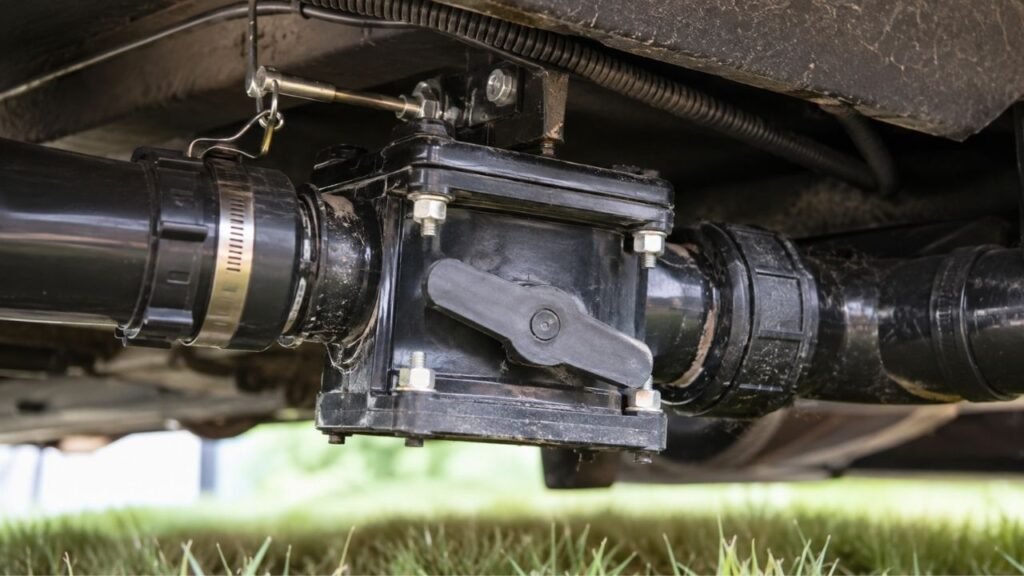
An RV waste valve can still leak after replacing the seal when the new gasket gets pinched, twisted, or installed slightly out of position. Debris inside the valve groove, uneven bolt pressure, incomplete gate travel, a damaged blade, or an incorrectly matched seal can also prevent the valve from closing completely.
The good news is that you usually do not need another complicated repair. I’ll walk you through how to find the exact leak, check your installation, and decide whether the seal, valve, cable, or plumbing needs attention.
Key Takeaways
- A new RV waste valve seal can leak if it becomes pinched.
- Debris in the valve groove can prevent complete gate closure.
- Uneven bolt tightening may distort the valve or compress seals incorrectly.
- A stiff handle after replacement often signals misalignment or excess compression.
- Remote pull cables sometimes prevent the blade from fully closing.
- A scratched or warped gate may leak against brand-new seals.
- Always confirm the correct seal size and valve design before installation.
- Test your repair with clean water before using the holding tank normally.
Why Can a New RV Waste Valve Seal Still Leak?
Replacing the rubber seals only solves problems caused by worn gaskets. The blade, valve body, mounting flanges, bolts, and operating mechanism must also work correctly.
The New Seal Was Pinched During Installation
A pinched seal is one of the most common causes.
RV waste valves normally sit between two plumbing flanges. You place a rubber seal on each side before sliding the valve body back into position.
The available space is often very tight.
If you force the valve body between the pipes, one seal can roll inward. Another section may fold underneath the valve body.
Everything may still bolt together normally.
Unfortunately, the folded area leaves a tiny passage for wastewater. Even a small gap can slowly fill the space behind your sewer cap.
If the leak started immediately after replacing the seals, I would check this possibility first.
The Seal Is Twisted or Not Fully Seated
The seal does not necessarily need to look badly damaged to leak.
A small section can slip outside its intended groove during installation. You may not notice this once the valve body covers everything.
The gasket must sit evenly around the entire opening.
If one side sits higher than another, the gate may not contact the rubber evenly. Wastewater can then pass around the blade.
Removing and carefully reseating the seal often solves this problem.
Debris Is Still Inside the Gate Groove
Installing new seals does not automatically clean the valve.
Small pieces of toilet paper, dried waste, mineral deposits, grit, or old gasket material can remain inside the blade track.
That debris can stop the gate before it reaches its fully closed position.
This creates an especially confusing situation.
You may install the new seals perfectly and still see leakage.
When you disassemble the valve, clean more than the visible gasket area. Pay close attention to the recessed track where the gate travels.
One tiny obstruction can be enough to cause seepage.
The Bolts Were Tightened Unevenly or Too Much
The four bolts around your waste valve hold the assembly together.
They need to apply relatively even pressure.
If you fully tighten one bolt before working on the others, the valve body may sit slightly crooked. The seals can then compress unevenly.
Overtightening can create another problem.
Too much compression can make the gate difficult to move. In some cases, excessive pressure may distort the plastic valve body.
A useful clue is handle resistance.
If your valve worked smoothly before the repair but became unusually stiff afterward, inspect the seal position and bolt compression.
Do not automatically tighten the bolts more because you see a leak.
More pressure is not always the solution.
The Wrong Replacement Seal Was Installed
Several RV waste valve seals look surprisingly similar.
Unfortunately, similar appearance does not guarantee proper fit.
RV waste valves come in different diameters and designs. Manufacturers may also use different seal profiles across valve generations.
Check the exact valve before buying replacement seals.
Look at:
- Valve diameter
- Manufacturer
- Valve series
- Seal shape
- Replacement kit number
- Older versus newer valve designs
Do not assume every seal for a 3-inch valve fits every 3-inch valve.
A slightly incorrect gasket may install successfully but still leak.
The Gate Blade Is Scratched, Warped, or Damaged
A seal can only work with the surface touching it.
Imagine installing a perfect rubber gasket against a badly scratched blade. Wastewater can still follow those damaged areas through the sealing surface.
Remove the valve and inspect the gate closely.
Look for:
- Deep scratches
- Rough edges
- Warping
- Chips
- Cracks
- Excessive wear
Light surface marks are not always serious.
Deep grooves or visible deformation are more concerning.
When the blade itself is damaged, replacing the entire waste valve generally makes more sense than repeatedly replacing seals.
The Cable Is Not Closing the Gate Completely
Some RVs place the actual waste valve behind an enclosed underbelly.
A cable connects the exterior handle to the gate.
That arrangement makes dumping convenient, but it introduces another possible failure point.
A cable can become:
- Stretched
- Rusted
- Kinked
- Misadjusted
- Loose at its connection
- Difficult to move inside its housing
The exterior handle might appear fully closed while the actual gate remains slightly open.
That tiny gap is enough for liquid to escape.
If you have a cable-operated valve, do not judge gate position using the handle alone.
First Determine Exactly Where the Leak Is Coming From
Before removing the valve again, find the actual leak location. Water passing through the closed gate requires a different repair than water leaking around the valve assembly.
| What You Notice | Likely Problem Area | What to Check First |
| Water collects behind the sewer cap | Gate is not sealing | Blade, seals, groove, cable travel |
| Slow trickle continues with valve closed | Gate sealing surface | Debris, pinched seal, damaged blade |
| Water appears around the valve body | Flange or gasket area | Seal position and bolt pressure |
| Leak began immediately after repair | Installation problem | Pinched seal, alignment, bolt tightening |
| Handle became hard to operate | Excess compression or misalignment | Bolts, seals, gate alignment |
| Handle closes but water still flows | Incomplete blade travel | Cable adjustment or obstruction |
| Leak comes from nearby plumbing | Pipe or tank connection | Joint, flange, pipe alignment |
| Only a few drops appear after driving | Residual trapped liquid | Clean and retest before disassembly |
This quick inspection can save you from taking everything apart unnecessarily.
Sometimes a small amount of liquid remains downstream of the valve. Movement while driving can make that liquid appear behind the cap later.
That does not always mean your tank valve is continuously leaking.
Clean the area and test again before rebuilding the valve.
How Can You Tell Whether the New Seal Was Installed Incorrectly?
Installation problems usually leave several useful clues. Compare how the valve behaved before and immediately after replacing the seals.
Watch for these signs:
- The valve became difficult to pull immediately after installation.
- Leakage started immediately after installing the replacement seals.
- The gate feels rough during one part of its travel.
- One side of the valve flange appears tighter than another.
- The handle stops before reaching its previous position.
- Water appears around the valve body itself.
- Repeatedly opening and closing the gate changes nothing.
- A removed gasket shows folding, cuts, or unusual flattening.
If several of these symptoms appeared after your repair, inspect your installation before buying another valve.
How to Fix an RV Waste Valve That Still Leaks After Seal Replacement
Approach the repair methodically rather than changing several parts at once. Empty and rinse the tank first so you can work more safely and identify the real cause.
Step 1: Empty and Thoroughly Rinse the Holding Tank
Start with the appropriate holding tank as empty as possible.
Flush it thoroughly with clean water.
For a black tank, continue flushing until the discharge becomes reasonably clear. This reduces the amount of waste around the valve during disassembly.
Wear disposable gloves and appropriate eye protection.
Remember that some liquid may remain inside low plumbing sections even after dumping.
Keep a suitable container nearby before opening the assembly.
Step 2: Test the Closed Valve With Clean Water
Before removing anything, confirm the leak.
Close the waste valve.
Introduce a modest amount of clean water into the tank.
Then inspect the sewer outlet.
If clean water slowly appears behind the cap or through a clear fitting, the gate is not sealing properly.
Also inspect around the valve body.
This tells you whether the leak passes through the gate or around the flange.
Step 3: Check the Handle and Full Gate Travel
Open and close the valve several times.
Pay attention to how the handle feels.
A normal gate should move through its entire range without suddenly becoming extremely tight.
If the valve uses a remote cable, inspect that system too.
Confirm the cable is not bending sharply or stopping before the gate reaches full closure.
A handle that reaches its stopping point does not guarantee the blade has completely closed.
Step 4: Check for Excessive Bolt Compression
If the valve became stiff after your repair, examine the four mounting bolts.
The assembly should be evenly tightened.
One corner should not be dramatically tighter than another.
If appropriate for your specific valve, carefully relieving excessive uneven compression can help you identify whether the valve is binding.
Do not operate the RV permanently with loose mounting bolts.
The goal is simply to identify whether excessive compression contributed to the problem.
Step 5: Remove the Valve and Inspect Both Seals
If the leak continues, disassemble the valve again.
Carefully inspect both replacement seals.
Look for:
- Folded sections
- Pinched edges
- Cuts
- Twisting
- Permanent flattening
- Uneven compression
- Incorrect dimensions
A badly pinched gasket should usually be replaced.
Rubber that has developed a permanent fold may not seal reliably after being repositioned.
Step 6: Clean the Blade, Grooves, and Mating Surfaces
This step is easy to rush.
Clean the blade track thoroughly.
Remove any toilet paper, hardened residue, grit, or pieces from the old gasket.
Wipe the mating surfaces clean as well.
Avoid scraping delicate sealing surfaces with sharp metal objects.
You want smooth, clean contact surfaces without creating new scratches.
Step 7: Inspect the Gate Blade and Valve Body
Now inspect the hardware itself.
Hold the gate where you can clearly see its sealing surface.
Look for deep scratches or areas that appear warped.
Inspect the valve housing for cracks.
Also check:
- Stem condition
- Gate edges
- Mounting holes
- Flange surfaces
- Valve-body distortion
If the gate is badly damaged, another gasket probably will not solve the problem.
Replacing the complete valve is usually the better repair.
Step 8: Reinstall the Correct Seals Carefully
Verify your replacement seals before installation.
Do not rely only on diameter.
Confirm they match your actual valve series.
Seat each gasket evenly around the flange.
Then create enough clearance between the pipes to insert the valve body without dragging heavily across the rubber.
This is important.
Trying to force the valve through a space that is too narrow often rolls the gasket inward.
Keep checking seal position as the valve enters the assembly.
If your manufacturer recommends an installation lubricant, use only a product that is safe for that gasket material.
Avoid random household oils or petroleum grease.
Step 9: Tighten the Four Bolts Evenly
Install the bolts and tighten them gradually.
An alternating pattern works better than fully tightening one corner immediately.
Bring the valve body together evenly.
Cycle the gate while tightening.
If the blade suddenly becomes difficult to move, stop and investigate.
Something may be misaligned or overly compressed.
Follow any specific tightening guidance provided for your valve model.
Step 10: Retest With Clean Water
Do not refill the black tank with waste immediately.
Test your work first.
Close the valve.
Add clean water.
Then inspect both possible leak locations.
Check for water passing through the closed gate.
Also check around the mounting flanges.
Cycle the valve several times and repeat the test.
A successful clean-water test provides much more confidence before your next camping trip.
What If the Valve Still Leaks After Reinstalling the Seals Correctly?
If the seals are properly seated and the valve still leaks, look beyond the gaskets. The blade, cable, housing, or plumbing alignment may be the real cause.
Inspect or Adjust the Remote Pull Cable
Cable-operated valves deserve extra attention.
Watch the gate mechanism while operating the handle when access allows.
The cable must move the blade through its entire range.
A small adjustment can sometimes restore full closure.
Replace the cable if it is badly corroded, kinked, or damaged.
Check for a Damaged Gate Blade
A scratched gate can repeatedly damage seals.
It can also provide a leakage path across otherwise healthy rubber.
If you can feel deep grooves with your fingernail, replacing the complete valve becomes more reasonable.
Look for a Warped or Cracked Valve Body
Plastic RV waste valves can become damaged over time.
Previous overtightening, impact, freezing conditions, or plumbing stress may distort the housing.
Inspect carefully around bolt holes and sealing areas.
A cracked or visibly distorted valve should be replaced.
Check the Flanges and ABS Plumbing Alignment
RV plumbing sometimes places sideways pressure on the valve.
Rigid ABS pipes do not flex much.
If the two flanges do not naturally line up, tightening the valve between them can force the housing sideways.
That pressure may distort the seals or gate track.
Correcting severe plumbing misalignment may require more work than another gasket replacement.
Replace the Complete Waste Valve
Eventually, rebuilding stops making financial sense.
I would consider replacing the full valve when:
- The blade is deeply scratched.
- The valve body is cracked.
- The housing appears warped.
- The stem is damaged.
- The valve repeatedly binds.
- New seals repeatedly fail.
- The valve still leaks after correct reassembly.
A complete replacement removes several uncertain components at once.
Should You Replace the Seal Again or Replace the Whole Valve?
The right choice depends on what you find during inspection. A simple installation mistake does not necessarily justify replacing the entire valve.
| What You Find | Best Next Step |
| Seal is pinched but still undamaged | Reinstall it correctly |
| Seal is torn or permanently folded | Replace the seal |
| Debris is stuck in the gate track | Clean and reinstall |
| Replacement gasket is incorrect | Install the proper seal kit |
| Gate is smooth and straight | Reuse the valve if everything else is good |
| Gate has deep scratches | Replace the complete valve |
| Valve housing is cracked or warped | Replace the complete valve |
| Cable prevents full gate travel | Adjust or replace the cable |
| Valve leaks after repeated correct rebuilding | Replace the valve |
| Leak comes from nearby plumbing | Repair the actual plumbing connection |
Try to replace the failed component rather than guessing.
That usually costs less and prevents repeating the repair.
Are Valterra and Bristol Waste Valve Seals Interchangeable?
Some RV waste-valve components are designed to work across several common valve systems, but that does not mean every replacement seal is automatically interchangeable.
This is where I recommend being careful.
Do not choose a seal simply because your valve has the same pipe diameter.
Verify the manufacturer, valve series, seal shape, generation, and replacement part number whenever possible.
Some replacement valve bodies may work with multiple brands. Individual gasket designs can still differ.
Using the exact replacement specified for your valve is the safer approach.
Should You Lubricate a New RV Waste Valve Seal?
Lubrication recommendations can vary between valve and gasket designs. Always follow the instructions provided for your specific replacement seal.
If lubrication is recommended, use a product intended for RV waste valves or compatible rubber seals.
Avoid assuming any household grease is safe.
Petroleum-based products can damage certain rubber materials.
The safest rule is simple: use only a lubricant that the valve or seal manufacturer identifies as compatible.
Mistakes to Avoid When Replacing RV Waste Valve Seals
A careful installation matters just as much as buying good replacement parts.
Avoid these common mistakes:
- Installing seals without cleaning the valve track first.
- Forcing the valve between tightly spaced pipes.
- Allowing the gasket lip to roll inward.
- Reusing a badly deformed replacement seal.
- Tightening one bolt completely before the others.
- Overtightening the valve assembly.
- Assuming all same-size valves use identical seals.
- Ignoring scratches on the gate blade.
- Assuming the handle position proves complete gate closure.
- Testing the repair with a full black tank immediately.
- Using an unsuitable lubricant on rubber components.
- Ignoring plumbing that forces the valve out of alignment.
Taking a few extra minutes during installation can prevent another messy repair.
How to Prevent the Leak From Returning
A properly installed waste valve usually needs little attention. Simple maintenance can reduce debris buildup, cable problems, and premature seal wear.
- Flush the holding tank thoroughly after dumping.
- Do not force a valve that suddenly becomes difficult to move.
- Investigate increased handle resistance early.
- Keep cable-operated valves moving smoothly.
- Cycle valves occasionally during long storage periods.
- Use only waste-valve-safe maintenance products.
- Correct unsupported or badly aligned plumbing.
- Avoid excessive force when closing the gate.
- Inspect the sewer outlet before your next long trip.
- Test any valve repair with clean water first.
For black tanks, keeping enough liquid in the tank during normal use also helps reduce dried waste around the valve area.
When Should You Call an RV Technician?
Most bolt-on waste valves are fairly straightforward, but some installations are difficult to access. Professional help becomes worthwhile when the valve sits behind a sealed underbelly or the surrounding plumbing must be cut or rebuilt.
I would also consider professional service if the holding tank cannot be safely emptied, the leak originates at the tank outlet, or the ABS plumbing is severely misaligned.
A technician can also help when a remote cable valve is buried deep inside the RV.
Persistent leaks after replacing both the valve and correct seals may point toward a nearby plumbing problem rather than the gate itself.
Final Verdict
If your RV waste valve leaks immediately after replacing the seal, do not assume the new gasket has already failed. Installation problems such as pinched seals, debris, uneven bolt pressure, and poor alignment are more likely places to start.
First determine whether water passes through the closed gate or leaks around the valve body. Then inspect seal placement, blade travel, bolt compression, gate condition, and cable movement. When the gate or housing is damaged, replacing the complete valve is usually more dependable than installing another seal kit.
Related FAQs
New seals solve many RV waste-valve leaks, but several related problems can produce almost identical symptoms. These quick answers can help you narrow down what is happening.
Why Is My RV Dump Valve Still Leaking With New Seals?
Your RV dump valve may still leak because the new seals are pinched, twisted, incorrectly sized, or sitting over debris. A scratched gate, warped housing, uneven bolt pressure, or cable that prevents full closure can also cause leakage.
Can Overtightening an RV Waste Valve Cause It to Leak?
Yes. Excessive bolt pressure can compress the seals unevenly, make the blade difficult to move, or distort the plastic valve housing. Tighten the bolts evenly according to the valve manufacturer’s recommendations rather than applying unnecessary force.
How Tight Should RV Waste Valve Bolts Be?
RV waste-valve bolts should be tightened evenly and securely without crushing the seals or binding the blade. Because valve designs differ, follow the manufacturer’s instructions instead of using one universal torque specification.
Why Is My RV Waste Valve Handle Hard to Pull After Replacing the Seals?
A suddenly stiff handle often means a seal became pinched, the valve body is misaligned, or the bolts are compressing the assembly too tightly. Debris inside the gate track can also increase resistance.
Can a New RV Waste Valve Seal Be Defective?
Yes, a new seal can occasionally be damaged or defective. However, first check for improper seating, incorrect fitment, debris, excessive compression, or gate damage because those problems are more commonly connected with leaks after installation.
How Do I Know If My RV Waste Valve Cable Needs Adjustment?
A cable may need adjustment when the exterior handle reaches its closed position but the valve still leaks. Other signs include limited handle travel, unusual resistance, visible cable slack, or a gate that stops short of full closure.
Should I Replace Both RV Waste Valve Seals at the Same Time?
Replacing both seals during the same repair usually makes sense because the valve body sits between two sealing surfaces. Installing matched, correctly fitted seals also reduces the chance of reopening the assembly soon afterward.
Can I Use Silicone Grease on RV Waste Valve Seals?
Use silicone grease only when it is compatible with your particular valve and gasket material. Check the manufacturer’s instructions first and avoid petroleum-based products or general-purpose lubricants that might damage rubber seals.
Do Valterra Waste Valve Seals Fit Bristol Valves?
Some RV waste-valve components are cross-compatible, but individual replacement seals are not universally interchangeable. Confirm the exact valve diameter, series, gasket profile, and replacement part number before using a seal across different brands.
Why Is There Wastewater Behind My RV Sewer Cap After Replacing the Valve Seal?
Wastewater behind the cap may indicate that the closed gate is slowly leaking, but it can also be residual liquid trapped downstream of the valve. Clean the outlet and perform a controlled test with fresh water before taking the valve apart again.

Steven Parker writes about everyday RV life, from setup tips to long-term living decisions. His content reflects a calm, experienced approach to RV ownership and travel. He focuses on comfort, reliability, and realistic expectations.