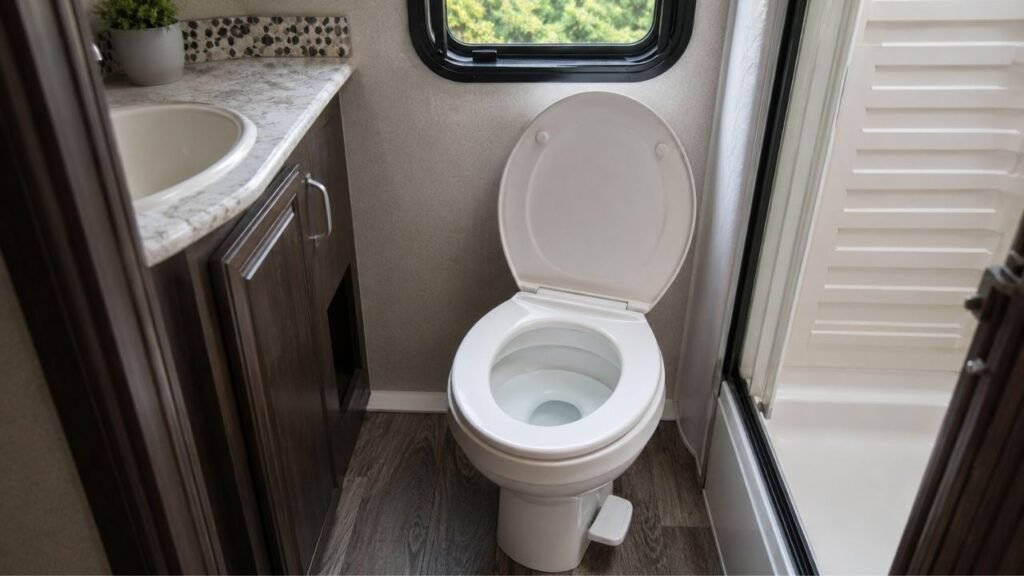
Your RV toilet usually won’t hold water because the flush-ball or blade seal is dirty, dry, displaced, worn, or damaged. A flush ball or blade that does not close completely can cause the same problem. Start by cleaning and inspecting the seal before buying replacement parts.
Below, I’ll help you figure out where the water is going, identify the likely cause, and work through the easiest fixes first. I’ll also explain what to check when a new seal still leaks.
Key Takeaways
- A dirty or worn bowl seal causes most water-holding problems.
- Clean and inspect the seal before replacing any toilet parts.
- Make sure the flush ball or blade closes completely.
- A toilet that won’t fill has a different plumbing problem.
- Always match replacement seals to your exact toilet model.
- Lubricant recommendations can vary between RV toilet manufacturers.
- Water around the toilet base usually indicates another type of leak.
Why Does an RV Toilet Need Water in the Bowl?
The small amount of water sitting inside your RV toilet bowl does more than keep the bowl looking clean. It also creates an important barrier between your bathroom and the black-water system below.
Most gravity-flush RV toilets use a flush ball or sliding blade at the bottom of the bowl. A rubber seal surrounds that moving component and helps create a watertight closure.
When everything is working properly, several inches of water should remain above that closed valve.
If the seal starts leaking, the water usually drains slowly into the black tank. Once the bowl becomes dry, black-tank odors may have a much easier path into your RV bathroom.
That is why a bowl that keeps going dry deserves attention.
Fortunately, the problem is usually concentrated around a few inexpensive parts.
First, Find Out Where the Water Is Going
Before taking anything apart, make sure you’re solving the correct problem. Where the water goes tells you a lot about which component needs attention.
| What You Notice | Most Likely Problem | What to Check First |
| Bowl slowly loses water | Dirty, dry, displaced, or worn seal | Clean and inspect the seal |
| Bowl empties very quickly | Flush ball/blade isn’t sealing | Watch the mechanism close |
| Water level drops slightly over time | Minor debris or seal wear | Clean sealing surfaces |
| Bowl doesn’t receive water | Supply or water-valve problem | Check pump, valve, and pressure |
| Water appears around toilet base | External leak or flange problem | Inspect connections and base |
| New seal still leaks | Installation or mechanism problem | Check seating and valve closure |
The most important distinction is simple.
If water enters the bowl normally but disappears afterward, concentrate on the bottom sealing system.
If the bowl never receives enough water, investigate the supply side instead.
If water appears on your RV floor, stop treating the problem as a simple bowl-seal leak. You may have a water connection, valve, bowl, or floor-flange leak.
What Causes an RV Toilet to Stop Holding Water?
Most causes have one thing in common: something prevents the rubber seal from sitting evenly against the flush ball or blade.
Debris Is Stuck Around the Bowl Seal
A tiny piece of toilet paper can cause a surprisingly frustrating leak.
Waste residue, hair, mineral deposits, paper fibers, and other debris can collect around the seal’s inner edge. That material creates a narrow gap between the rubber and the flush mechanism.
Water then slowly works through that gap.
This is why I recommend cleaning before ordering any replacement parts.
The seal can look perfectly normal while hiding debris underneath its lip.
The Seal Has Shifted Out of Position
The rubber seal needs to sit evenly inside its intended groove.
Sometimes cleaning, repeated flushing, age, or previous repairs can leave part of the seal slightly raised or folded.
That tiny change may be enough to prevent a watertight closure.
Look around the entire circumference of the seal. It should sit evenly without obvious waves, folds, or raised sections.
Some Dometic toilet models are particularly easy to inspect from above.
If your seal looks displaced, gently reseating it may solve the problem immediately.
The Rubber Seal Is Dry or Stiff
RV toilet seals depend on flexible rubber making consistent contact.
When rubber becomes dry or hardened, it cannot conform properly around the moving flush component.
This can happen after:
- Long periods of storage
- Hot summer conditions
- Winter storage
- Repeated exposure to unsuitable cleaners
- Normal aging
You may notice the problem when taking your RV out after several unused months.
A dry seal isn’t automatically ruined.
Cleaning and conditioning it with the product recommended for your toilet may restore enough flexibility to hold water again.
The Seal Is Worn, Cracked, Flattened, or Torn
Eventually, cleaning cannot solve the problem anymore.
Closely inspect the seal and look for:
- Visible cracking
- Torn edges
- Missing rubber
- Permanent flattening
- Hard or brittle areas
- Uneven shape
- Deep deformation
If the seal cannot return to its original shape, replacement usually makes more sense than repeated cleaning.
Don’t keep adding lubricant to physically damaged rubber.
Lubricant can help healthy rubber remain flexible. It cannot repair a tear or restore missing material.
The Flush Ball or Blade Is Dirty or Damaged
The rubber seal gets most of the attention, but it only represents half of the sealing surface.
The flush ball or blade must also remain smooth and clean.
Mineral deposits, scratches, nicks, and hardened residue can create tiny channels where water escapes.
Imagine pressing a rubber gasket against a scratched surface. The gasket may look closed, but the scratch creates a path underneath it.
Inspect the visible portion of the flush mechanism carefully.
If you see serious scratches, chips, or deformation, replacing only the rubber seal may not solve anything.
The Flush Ball or Blade Does Not Close Completely
Watch the mechanism after releasing your flush pedal.
The flush ball or blade should return fully to its closed position.
If it stops slightly short, water can drain directly into the black tank.
Possible causes include:
- Debris around the mechanism
- A sticking pedal
- Excessive friction
- Worn linkage
- A weak return mechanism
- Misaligned components
- Mechanical damage
Don’t assume the rubber seal is defective until you’ve watched the valve close.
A brand-new seal cannot stop water if the flush valve remains partially open.
Toilet Assembly Alignment Is Affecting the Seal
Some RV toilets depend on several components remaining correctly aligned.
If previous repairs were performed incorrectly, the flush mechanism may no longer contact the seal evenly.
Depending on your toilet design, improper clamp tension, assembly position, or mechanism alignment can contribute to leakage.
Avoid randomly loosening toilet mounting hardware.
The correct adjustment depends on the toilet model.
Identify your exact toilet first, then follow the manufacturer’s procedure for that design.
How to Fix an RV Toilet That Won’t Hold Water
I recommend working from the least invasive fix toward replacement. That way, you don’t spend money replacing a perfectly usable seal.
Step 1: Shut Off the Toilet Water Supply
Turn off your RV water pump.
If you’re connected to campground water, disconnect the hose or close the appropriate supply.
Flush once to relieve remaining pressure.
Put on disposable gloves before working around the bowl opening and seal.
You don’t need complicated tools for the initial inspection.
Step 2: Inspect the Flush Ball, Blade, and Seal
Hold the flush pedal down so the valve opens.
Use a flashlight if necessary.
Check around the entire seal for:
- Toilet paper
- Hair
- Waste residue
- Mineral scale
- Cracks
- Tears
- Folded rubber
- Uneven seating
Then inspect the flush ball or blade.
Look for scratches, damaged edges, or deposits on the sealing surface.
Release the pedal afterward and confirm that the mechanism closes completely.
Step 3: Clean the Seal and Mating Surface
Use a soft cloth, sponge, or soft-bristled brush.
Gently clean around the rubber seal and the surface it contacts.
Avoid aggressive scrubbing.
You don’t want to turn a dirty seal into a scratched flush ball.
Stay away from sharp screwdrivers, metal picks, abrasive pads, and other tools that can damage rubber or plastic surfaces.
Use an RV toilet cleaner compatible with your toilet’s materials.
Strong household chemicals may gradually dry or damage certain seals.
Once everything looks clean, rinse the area thoroughly.
Step 4: Reseat the Seal if It Has Shifted
If part of the rubber seal looks raised, carefully press it back into its proper position.
Work your way around the entire circumference.
The seal should sit evenly rather than bulging upward in one section.
Don’t aggressively stretch the rubber.
You’re trying to return it to its groove, not reshape it.
After reseating, operate the flush pedal several times.
Watch the mechanism close and check whether the seal remains positioned properly.
Step 5: Lubricate or Condition the Seal Correctly
This is where generic internet advice can cause trouble.
Not every RV toilet manufacturer gives identical lubrication instructions.
The safest approach is to check the recommendation for your exact toilet model.
Thetford commonly recommends a silicone-based, non-petroleum seal lubricant or conditioner.
Some Dometic replacement instructions for certain 300, 310, and 320 toilets permit silicone grease or petroleum jelly during seal installation.
That is why I wouldn’t apply one universal lubricant rule to every RV toilet.
Use the product specified for your model.
Also avoid experimenting with cooking spray, random automotive lubricants, or household chemicals. Something that feels slippery today can damage rubber later.
Step 6: Perform a Water-Holding Test
Once you’ve cleaned and serviced the seal, close the flush mechanism.
Restore the water supply and put several inches of water into the bowl.
Remember the waterline.
Check it after about 10 to 15 minutes.
Then check again after 30 to 60 minutes.
If the level remains stable, you’ve probably solved the problem.
If it continues dropping, you’ll need to inspect the seal more closely.
I wouldn’t diagnose the exact failure based only on how many minutes draining takes. Different seal conditions can produce similar drain rates.
Step 7: Replace the Bowl Seal if Necessary
Replace the seal when cleaning, reseating, and proper conditioning no longer work.
Replacement makes sense when:
- The rubber is cracked
- The seal has torn
- It remains stiff
- The shape is permanently distorted
- It cannot sit evenly
- Water continues leaking despite correct cleaning
- The sealing surface is clean and closes fully
Before buying anything, identify your exact toilet model.
That simple step prevents one of the most frustrating RV toilet repair mistakes.
Before Buying a New Seal, Identify Your RV Toilet Model
Different RV toilets can look almost identical while using completely different seals. Don’t order replacement parts based only on appearance.
Check these locations for identifying information:
- Label behind the toilet
- Sticker near the toilet base
- Area underneath the seat
- Owner’s manual
- RV documentation
- Manufacturer parts diagram
Write the brand and complete model number down.
Then buy the replacement seal specifically listed for that model.
For example, knowing that you own a Dometic toilet isn’t enough. Different Dometic models can use different repair parts and procedures.
The same applies to Thetford toilets.
Ordering by model number costs nothing and can save you from repeating the repair.
Dometic vs. Thetford RV Toilets: What Changes?
Dometic and Thetford toilets accomplish the same basic job, but their internal designs aren’t identical. Always treat model-specific repair instructions as more reliable than universal advice.
Dometic RV Toilets
Many popular Dometic gravity-flush toilets use a rotating flush ball underneath the bowl.
On certain models, including several toilets within the 300-series family, the flush-ball seal can be accessed through the bowl opening.
That can make replacement relatively straightforward.
However, don’t assume every Dometic toilet uses the exact same procedure.
Confirm your model before removing anything.
Thetford RV Toilets
Thetford uses several toilet designs across its Aqua-Magic, Bravura, and other product families.
Depending on the model, you may encounter a blade-style or ball-style flushing mechanism.
Access to the seal also varies.
Some repairs involve considerably more disassembly than others.
Use your model number to identify the correct service kit and replacement procedure.
Why You Shouldn’t Treat Both Brands the Same
There are several practical differences between RV toilets:
- Flush mechanism design
- Seal dimensions
- Seal access
- Replacement procedure
- Lubricant recommendation
- Spring and linkage arrangement
- Required service kits
This is also why a repair trick that works perfectly on another owner’s toilet might not be suitable for yours.
How to Replace an RV Toilet Bowl Seal
Seal replacement is usually manageable for a careful DIY owner. However, the exact procedure changes between toilet models, so use these steps as a general guide rather than forcing them onto every design.
Gather the Correct Parts and Supplies
Before starting, have these items ready:
- Correct model-specific replacement seal
- Disposable gloves
- Soft cleaning cloth
- Manufacturer-approved lubricant
- Basic hand tools, if required
- Replacement floor seal if toilet removal is necessary
Don’t remove your toilet before confirming whether seal replacement actually requires it.
Some designs allow easier access.
Replacing the Seal on Certain Dometic 300-Series Toilets
On compatible models, the basic procedure commonly looks like this:
- Shut off the RV water supply.
- Hold the flush mechanism open.
- Remove the old seal from above.
- Clean the seal seating area thoroughly.
- Clean the flush-ball surface.
- Install the new seal evenly.
- Apply approved lubricant as instructed.
- Make sure the seal sits correctly.
- Restore the water supply.
- Fill the bowl and test for leakage.
The key is getting the seal evenly positioned.
A new seal installed crooked can leak just like an old one.
Replacing the Seal on Thetford Toilets
Thetford replacement procedures vary more noticeably between models.
Some toilets require additional disassembly to reach the seal.
Others use different repair kits depending on the blade or ball mechanism.
Identify the toilet model and follow that model’s service procedure.
If toilet removal is necessary, you may also need a new floor-flange seal before reinstalling the toilet.
Don’t reuse damaged sealing components simply to finish the job faster.
Why Won’t My RV Toilet Hold Water After Replacing the Seal?
A new seal should solve a worn-gasket problem, but replacement doesn’t guarantee success. If the bowl still drains, something else is preventing proper contact.
The Replacement Seal Is Wrong for the Model
A seal can look almost identical while having slightly different dimensions.
Even a small mismatch may prevent proper compression.
Check the package number against your exact toilet model.
If the seal isn’t explicitly compatible, don’t assume close enough is good enough.
The New Seal Is Not Fully Seated
Run your finger around the seal’s entire edge.
You shouldn’t find one area sitting noticeably higher than another.
Remove and reinstall the seal if necessary.
Don’t keep forcing the flush mechanism against a poorly seated gasket.
Dirt Remains on the Flush Ball or Blade
A common mistake is replacing the rubber seal without thoroughly cleaning the opposite sealing surface.
Any residue left on the flush ball or blade can still create a leak path.
Clean both surfaces before blaming the replacement gasket.
The Flush Ball or Blade Is Damaged
A scratched or distorted flush component may never create an even seal.
Inspect it under good lighting.
Deep scratches, grooves, chips, or deformation can allow water through even when the valve appears closed.
At that point, you may need a flush-mechanism repair rather than another rubber gasket.
The Flush Mechanism Is Not Returning Fully
Operate the pedal several times while watching the valve.
It should return completely every time.
If it consistently stops short, investigate the pedal, linkage, spring mechanism, or other moving components.
A replacement seal cannot compensate for an open valve.
Another Toilet Component Is Misaligned
Certain toilet designs rely on mechanical components maintaining specific tension and alignment.
If the toilet was previously disassembled, incorrect reassembly could affect flush-ball position or seal compression.
Consult the correct service instructions instead of guessing which bolt or clamp needs adjustment.
The Toilet Bowl or Base Is Cracked
If water appears outside the toilet, inspect the bowl and base carefully.
A cracked toilet can sometimes make the situation look like a bowl-seal problem.
Follow the water.
Water disappearing directly into the black tank suggests the bottom seal.
Water reaching the RV floor indicates you need to inspect another area.
Problems That Look Like a Bad Bowl Seal but Aren’t
Not every RV toilet water problem comes from the flush-ball or blade seal. Paying attention to the exact symptom can prevent replacing perfectly good parts.
The RV Toilet Will Not Fill With Water
If pressing the pedal doesn’t add enough water to the bowl, check the supply side.
Possible causes include:
- Water pump turned off
- City-water supply problem
- Low water pressure
- Blocked inlet screen
- Faulty water valve
- Pedal linkage problem
A leaking bowl seal removes water after filling.
It normally doesn’t prevent water from entering the toilet.
Water Is Leaking Around the Toilet Base
Water around the floor requires a different inspection.
Possible areas include:
- Floor-flange seal
- Water supply connection
- Water valve
- Vacuum breaker
- Cracked toilet body
Don’t assume replacing the internal bowl seal will stop an external leak.
Dry the area thoroughly and watch where fresh water first appears.
The Toilet Keeps Adding Water
A toilet that keeps filling usually points toward the water valve or flush linkage.
This deserves quick attention because an overflowing RV toilet can create expensive interior damage.
Turn off the water supply until you identify the problem.
The Bowl Holds Water but You Still Smell the Black Tank
If your bowl maintains its water level but sewer odors remain, broaden your inspection.
Possible sources include:
- Toilet floor seal
- Black-tank venting issue
- Waste buildup inside the tank
- Plumbing connection problem
- Other sanitation-system leaks
Don’t repeatedly replace a good bowl seal just because your bathroom smells.
The retained water level tells you the seal is probably doing its job.
How to Keep an RV Toilet Seal From Leaking Again
A little routine attention can help your seal stay flexible and close properly.
- Keep toilet paper and debris away from the seal groove.
- Clean the flush mechanism with non-abrasive products.
- Use cleaners considered safe for your toilet materials.
- Lubricate the seal only with an approved product.
- Inspect the seal during seasonal RV maintenance.
- Check the mechanism when the flush pedal starts sticking.
- Winterize the toilet according to manufacturer instructions.
- Never force a flush mechanism that may be frozen.
- Keep your toilet model number with your maintenance records.
- Replace visibly damaged seals instead of repeatedly conditioning them.
I also recommend inspecting the seal when bringing your RV out of long-term storage.
Catching a dry or displaced seal early is easier than discovering the problem after odors enter the coach.
When Should You Replace the Seal Instead of Cleaning It?
Cleaning should usually be your first repair because residue causes many water-retention problems.
Replacement becomes the better choice when the rubber itself has physically deteriorated.
A torn, badly cracked, permanently hardened, or severely distorted seal generally won’t recover through lubrication.
You should also consider replacement when the seal looks correctly positioned, the mating surface is clean, the valve closes completely, yet the bowl continues losing water.
At that point, repeatedly cleaning the same gasket usually wastes time.
Install the correct model-specific replacement instead.
When Is It Better to Replace the Entire RV Toilet?
Most toilets shouldn’t be replaced just because the bowl loses water. A simple seal repair is far less expensive.
However, full replacement can make more sense when:
- The toilet bowl is cracked.
- The base has structural damage.
- Several internal components have failed.
- Required repair parts are discontinued.
- Flush-mechanism damage is extensive.
- Previous repairs repeatedly fail.
- Repair costs approach replacement cost.
- The toilet no longer operates reliably.
Consider the toilet’s overall condition rather than its age alone.
An older toilet with readily available parts can still be worth repairing.
A newer toilet with major structural damage may not be.
Final Words
When your RV toilet won’t hold water, start simple. Clean the seal, inspect its position, check the flush ball or blade, use the correct lubricant, and test the bowl again.
If water still disappears, move toward seal replacement and mechanism inspection. Most importantly, identify your exact toilet model before ordering anything. That one step can save you from buying the wrong seal and repeating the entire repair.
Related FAQs
Why Does My RV Toilet Lose Water Overnight?
A slow overnight water loss usually means the flush-ball or blade seal isn’t completely watertight. Dirt, dried rubber, minor seal wear, or an unevenly seated gasket can create a tiny opening that gradually lets water drain into the black tank.
Why Won’t My Dometic RV Toilet Hold Water?
A Dometic RV toilet commonly loses bowl water when its flush-ball seal is dirty, displaced, worn, or unable to sit evenly against the ball. Also check whether the flush ball returns completely after releasing the pedal and whether its surface has scratches or buildup.
Why Won’t My Thetford RV Toilet Hold Water?
A Thetford toilet may stop holding water because debris is trapped around the blade or ball seal, the rubber has hardened, or the flush mechanism isn’t closing fully. Clean both sealing surfaces first, then inspect the gasket for physical damage.
Can I Use Vaseline on an RV Toilet Seal?
Don’t apply one lubricant rule to every RV toilet. Some Dometic models permit petroleum jelly during specific seal procedures, while Thetford generally recommends a silicone-based non-petroleum conditioner. Check the instructions for your exact toilet model before applying anything.
Why Won’t My RV Toilet Hold Water After Winterizing?
Storage can leave the bowl seal dry, stiff, dirty, or slightly displaced. Inspect the seal after de-winterizing, clean it thoroughly, and condition it using the product recommended for your toilet. Also inspect for freeze damage if other plumbing symptoms appear.
Why Does My RV Toilet Still Leak After Installing a New Seal?
A new seal can still leak if it’s the wrong part, isn’t seated evenly, contacts a dirty or scratched flush ball, or the flush mechanism doesn’t close completely. Recheck the seal installation and watch the valve operate before replacing another gasket.
How Do I Know Whether the Flush Ball or Seal Is Bad?
Open and close the toilet while watching the mechanism. If the ball or blade closes completely but water still drains, inspect the seal and both mating surfaces closely. Visible scratches, warping, cracks, or uneven contact can help identify which component needs replacement.
Does a Bad RV Toilet Water Valve Cause the Bowl to Drain?
Usually not. The water valve controls water entering the toilet, while the flush-ball or blade seal holds water inside the bowl. If the toilet fills normally but later becomes empty, concentrate on the bottom seal and flush mechanism first.
Can a Bad RV Toilet Seal Cause Black-Tank Odors?
Yes. When the seal leaks, the bowl eventually loses the water that helps separate your bathroom from the waste system below. A dry bowl can therefore make black-tank odors more noticeable inside your RV.

Steven Parker writes about everyday RV life, from setup tips to long-term living decisions. His content reflects a calm, experienced approach to RV ownership and travel. He focuses on comfort, reliability, and realistic expectations.